
The Intersection of Art and Nature
I love finding myself at the intersection of art and nature. My passion for those two roads has led me to great places, wonderful people, and to beauty, insight, and mystery. Here, a simple fern in the Lyman Conservatory at Smith College has transported me half a world away to the rain forests of Malaysia. It has made me think about symbiotic relationships and to wish I had taken Latin. It has given me hours of artistic challenge and pleasure. And it has left me both grateful and eager for more.
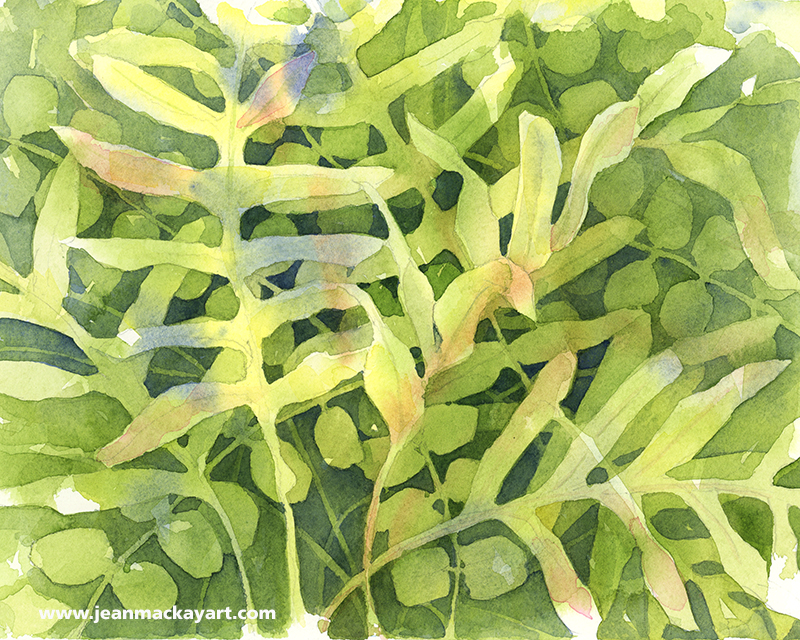
(click to view larger; top: watercolor and ink in Stillman & Birn “Beta” sketchbook 8.5×11″. Bottom: watercolor on 140lb Fabriano cold press paper 8×10″)
Tips and Techniques: I began these two paintings at the Conservatory, knowing it would be fascinating to take two very different approaches. While layers of paint dried on one, I rotated to the other. I had the major shapes established at closing time and finished both at home. What’s interesting to me is how each conveys such a different part of my experience in the greenhouse: one about being surrounded by layers of greenery, the other about a particularly intriguing fern. So, if there is a lesson here, it may be to consider what you most want to capture or convey when you begin drawing or painting. In essence, What draws you in? And what techniques are best suited to sharing that?
Green Fix
Where to begin? Presented with 3,000 plants in every shade of green and every texture and pattern of leaves, choosing a subject was no small task at the Lyman Conservatory at the Botanic Garden of Smith College in Northhampton, Mass. I spent the day there sketching and generally getting a much needed green fix after months of winter browns. Here’s the first of the pieces I did there, an exotic pitcher plant native to Borneo.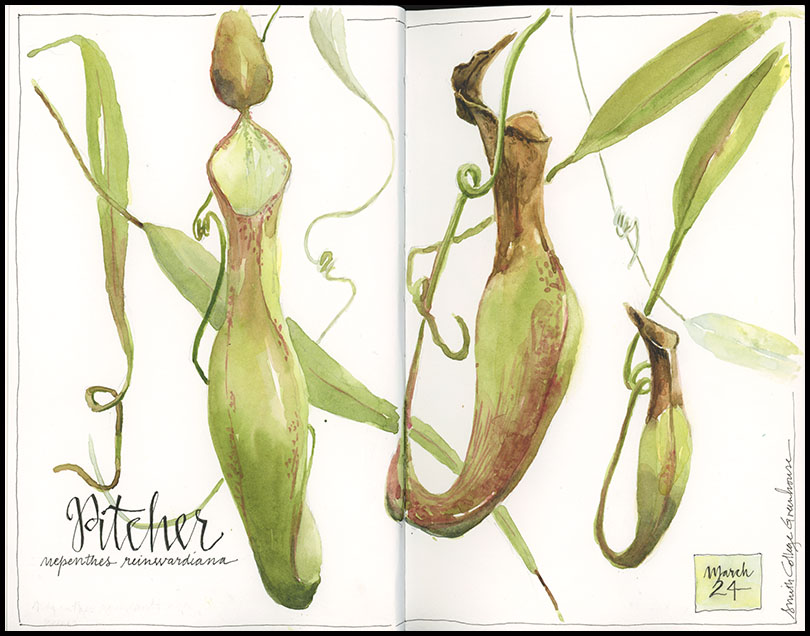
Tips and Techniques: What could be better for practicing how to mix greens? Use house plants or find a greenhouse near you and see how many shades of green you can mix. I used primarily sap green with raw umber and quin rose for the pitcher plants, but burnt sienna made its way into the tops of the pitchers and a lighter mix of sap green and cobalt blue helped the leaves and vines in the background recede. Take care when using reds with greens—mixing the two when wet will give you nice browns, but if you want to keep the red tones, wait until the green has dried and then add a layer of red on top.
Nest Trio
I get up early to make the 1.5 hour drive to the small town of Granville, New York, not far from Vermont’s Green Mountains. Arriving just before 10am gives me just enough time to buy a coffee before the doors open at one of my favorite places to sketch: the Pember Museum of Natural History. I make this pilgrimage once a year and I’ve already decided where I’ll spend the next four hours: hovering over the glass and cherry cases of Victorian-era bird nests and eggs. The selection is fantastic: eggs of every size and pattern, from tiny cream-colored hummingbird eggs to the huge streaked egg of the extinct great auk, and rows of woven nests decorated with leaves, lichen, and moss. I’ve drawn a good number of them over the years, so I choose ones I’ve passed over previously, put pen to paper, and begin. Hours later at closing time, it’s just me and the lone curator left in the museum and I’m satisfied…though I already look forward to my return next year.
I sketched this trio of nests in detail using a Micron pen on Fabriano hot press watercolor paper and painted them later at home. I did a fourth in my journal— the nest of the sedge wren, posted last week.
Tips and Techniques: When drawing a nest, spend a few minutes really looking at how it’s made before beginning. There are often interesting bits of materials that you’ll want to highlight. Usually the weave gets tighter in the inner cup, which may also be lined with downy material or feathers. Consider that the bird has already created the masterpiece. Your job is to translate it onto paper. Keep your lines very loose as you start, following the weave of twigs, grasses, or pine needles around the cup-like shape. Once the basic structure and strands of material are roughed in, I typically use negative painting (or drawing) techniques to weave darker shapes and strands underneath lighter ones to develop the complex weave. Pay attention to values! Getting darks and shadows in place will really make your nest take shape.
I will be ordering prints of this painting for sale for $30 (includes mailing). If you would like to order a copy, please e-mail me at jeanmackay.art@gmail.com. Prints are made on archival quality Hahnemuhle Museum Etching paper, 8”x10” and suitable for easy matting and framing.
The Faint Echo of Spring
I found this nest in the collection of the Pember Museum of Natural History in Granville, NY, where I spent the better part of a day sketching nests that have outlived their builders by more than a century. Somewhere in the weave of stems lies the faint echoes of a grassy wetland, the calls of birds and frogs, the mix of cool air and warm sunshine, of another springtime. I’ve never seen a sedge wren (also called the short-billed marsh wren), and this is as close as I may come. Can you imagine how such a small bird weaves a ball of a nest with nothing more than a beak?
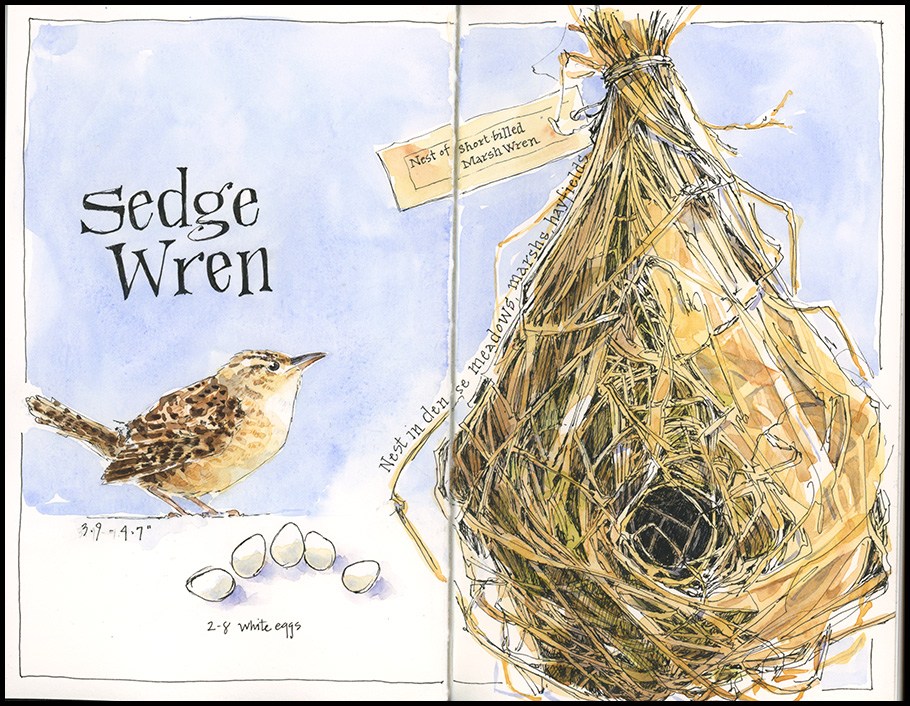
Tips & Techniques– Include field notes in your journal to make it a good reference for what you discover and learn. When I first saw the label on this nest I didn’t know that there were two distinct marsh wren species: a short-billed and a long-billed. I had seen marsh wren nests that didn’t look quite like this, and a quick Google search explained why—the ones I’d seen were made by the long-billed marsh wren. These two species have different colored eggs, too: white versus mottled purplish brown. Art, discovery, and learning fit together beautifully for me in the pages of my journal. I hope you have opportunities to do the same!
Return to Snow
The blackbirds returned two weeks ago– a huge flock of red-winged blackbirds and grackles. They hang out in nearby fields and wetlands, and every few days turn up squawking in the tall trees surrounding our yard, then scatter in a great mass of beating wings. But today, amidst a foot of new snow, they stay. Hunkered down at our feeders, they clean us out twice over. And what could be better: The birds or knowing that, despite the snow, we’re on the other side of winter?
Tips & Techniques: Since these birds were never still for more than a few seconds, I decided to skip the pencil and go direct to watercolor, using a size 5 DaVinci travel brush. If you have a feeder, give it a try: it’s a good way to work quickly, focusing on the general shape of birds in different postures without getting caught up with details.
Astonished
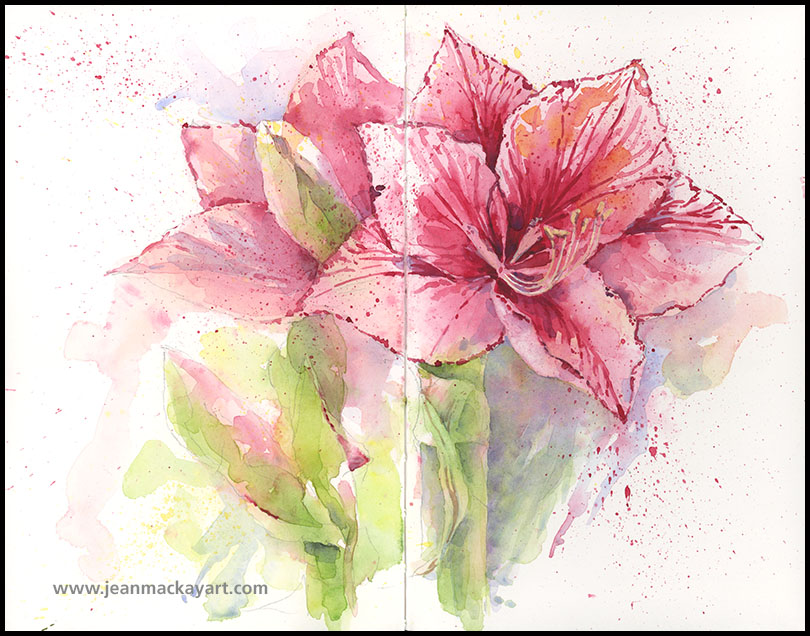
It was like a crime scene: the beauty lay on the floor, mangled and broken; a mess of soil and tangle of roots lay about her. Alas, it was the amaryllis’s own radiance that did her in. Her blossoms grown so heavy atop the three-foot stalk that she tumbled off the table to the floor just two days after opening. Stricken in her prime— and while having her portrait painted!— I salvaged what I could, dissected one flower for study, and finished these pages.

Color Play
What better time than the dead of winter to play with color? I recently bought a new paint tin from Schmincke (I really just wanted the tin, but decided to get it full instead of empty) and I also received six tubes of QoR watercolors from Golden to try. But before adding any new colors to my palette, I took time this week to test them. What follows is not a brand review, as much as a glimpse into the practice of being a painter.
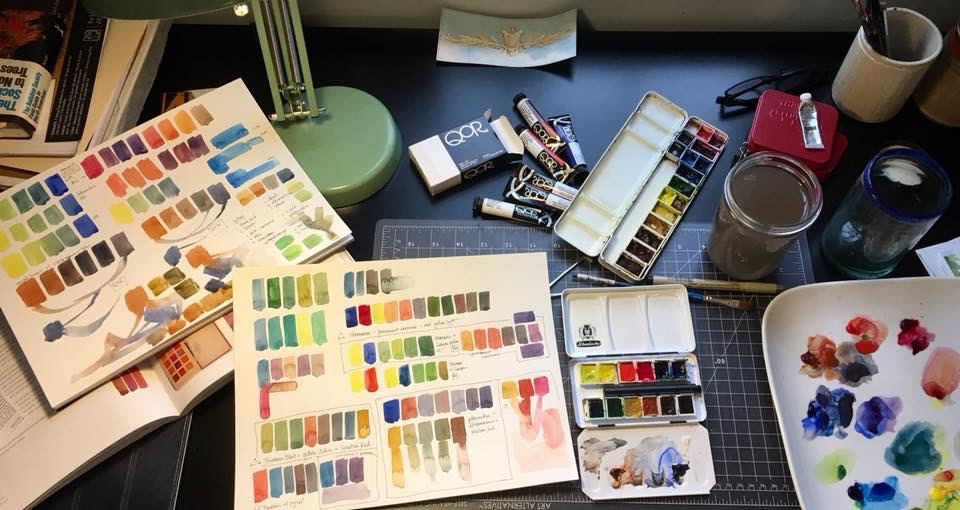 I set about playing with various triads of primary colors with the goal of figuring out which ones looked promising for future paintings. This may sound simple, but given the huge range of colors that you can make from various reds, yellow, and blues, it quickly becomes a complex proposition. I tend to use a limited palette to create color harmonies, so it’s critical for me to have a sense of which combinations work best. After creating a huge mess of test sheets, I recorded the winning triads in my journal.
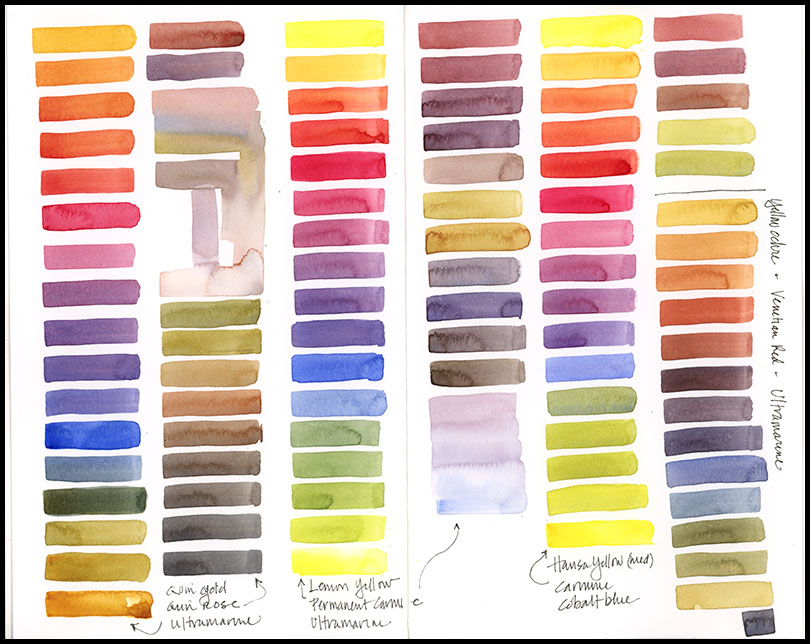
click to view larger
I also needed a refresher on greens, so I created a green page, along with experiments using raw umber (a color I need to get to know better) with cobalt and ultramarine blue (nice blue-grays there, eh?).
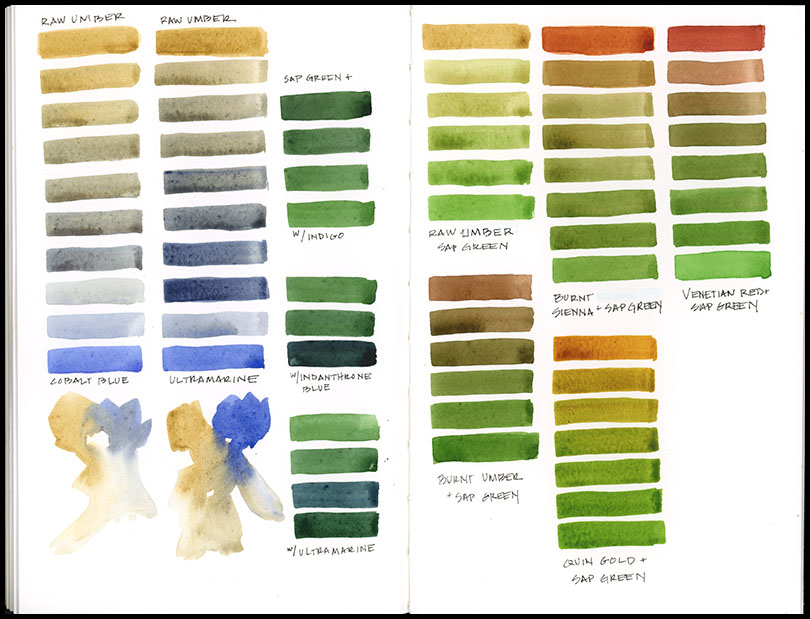
click to view larger
Finally, inspired by Mimi Robinson’s book Local Color, I decided to create a color palette to capture the landscape colors outside my window this morning. After the week’s riot of color mixing, I was quickly back to subdued hues—but at least I felt confident finding them in my paint box.
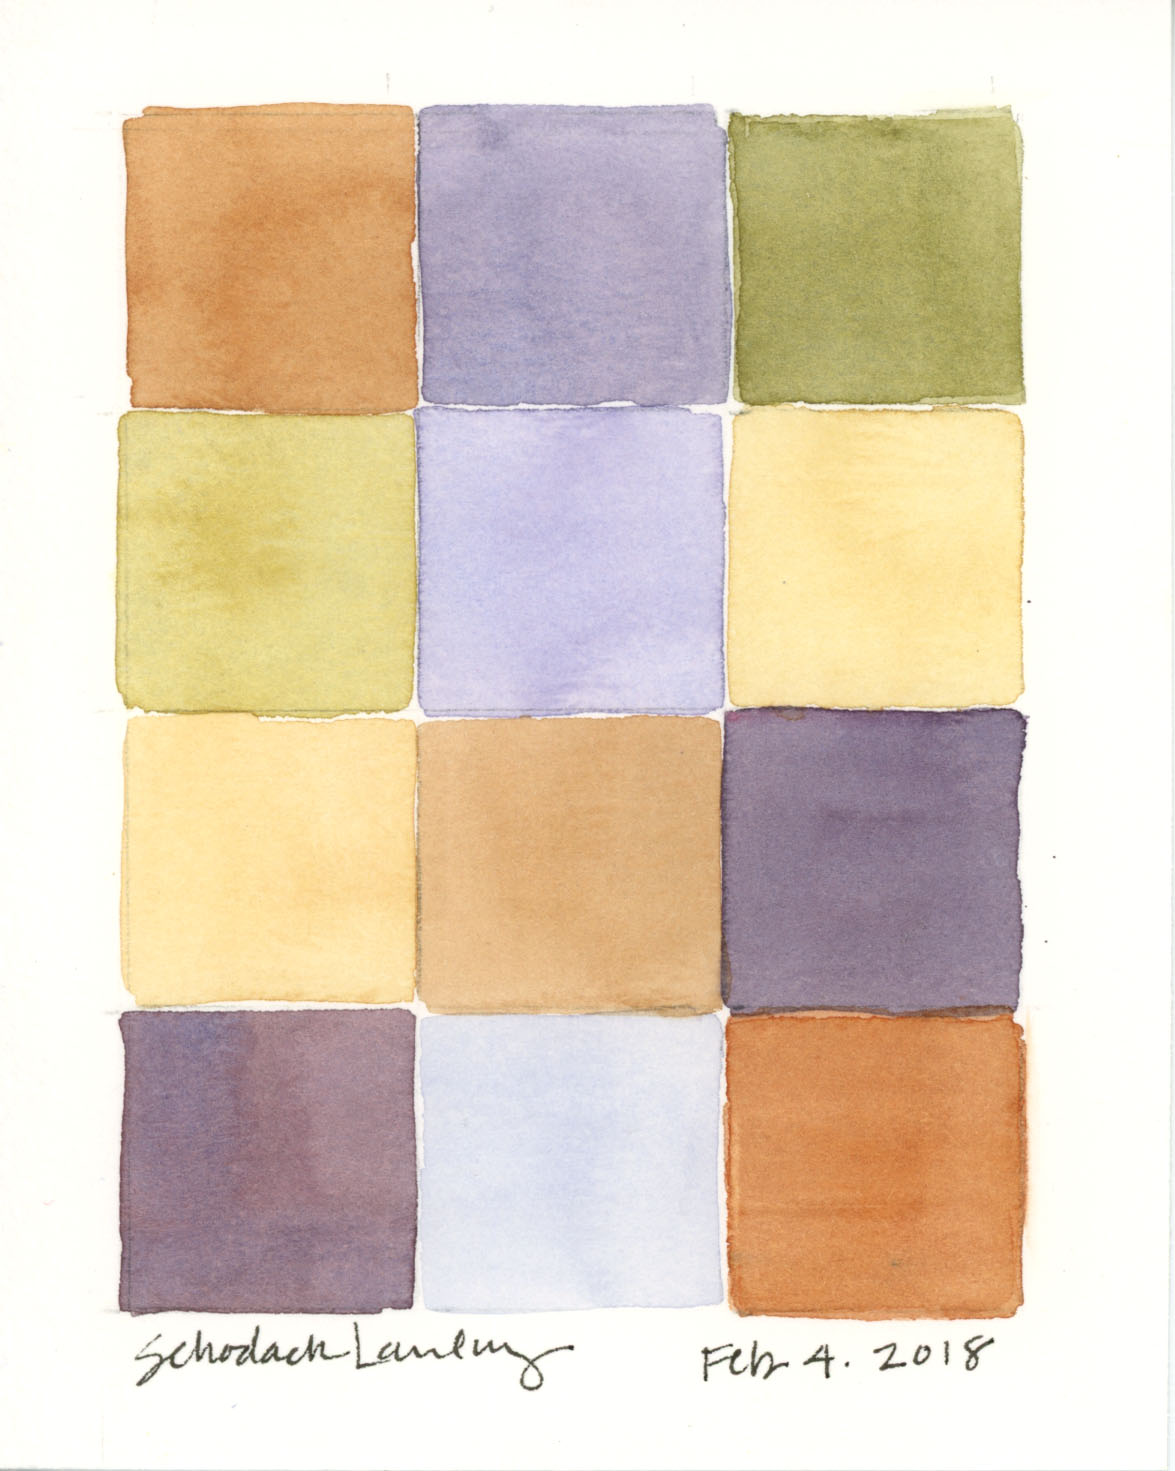
click to view larger
Tips and Techniques– The important takeaway here is not to run out and buy a bunch of new paints or even to copy down the combinations I found most promising. Rather, it is to get to know the paints in your own palette. Taking the time to mix colors and figure out which combinations work best will pay huge dividends when you launch into a painting. You’ll gain confidence with color mixing, figure out your favorites, and take out little used paints that clutter your box or result in murky mixes. Start with red, yellow and blue mixes. But also try combinations of blues and browns, which will give you lots of lively and interesting grays.
Goldenrod Galls
What began as a simple search for interesting props for my upcoming Sketching Nature workshop, led to a great illustration of how much there is to discover if we only look more closely. Among the things I collected were the dried stems of goldenrod, many of which had classic round goldenrod galls. But I soon discovered other deformities that I hadn’t noticed before: stunted stems with tufts of leaves at the tops, and elliptical-shaped growths on stems.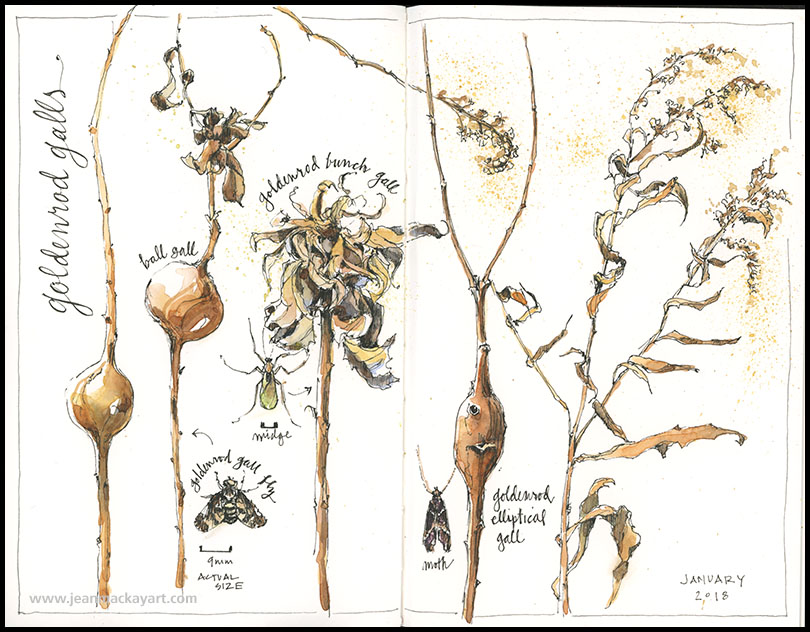
It turns out that more than 50 species of insects—mostly flies, midges, and wasps– lay their eggs on goldenrod stems. When the larvae hatch, they borrow into the stem, causing the plant to form a protective chamber around the growing grub. When the larvae transforms into an adult, it emerges from its hideaway and flies off. Sometimes woodpeckers drill into the gall for a meal, in which case, you’ll find a small hole in the gall. For the most part, the insects don’t harm the plant; though in the case of the bunch gall, they do stunt the growth of the stem, causing leaves to sprout at the top and curtailing the growth of flowers.
So, there you have it…a bit of natural history for your day and an invitation to go out and see what you can discover.
Tips & Techniques– Keep it simple! I wanted this page to illustrate how much you can do with a few simple things on a page and a limited amount of time. I drew everything directly in pen and shaded only the darkest areas. I added watercolor in three loose layers, using combinations of yellow ochre, burnt sienna, and ultramarine blue. A bit of spatter near the dried flowers and the “goldenrod galls” text were my finishing touches.
Out of the Shadows
Owls are master’s of silence, darkness and shadow, so spotting one is not easy. Painting one is not especially easy either. Still, I wanted to play with the idea of pulling an owl out of shadowy woods using a limited palette of blues and browns– though you’ll see that I added yellow ochre midway through to warm things up. I didn’t set out to paint every detail, but rather to strive for an overall impression. Here’s the finished piece– I took a series of photos along the way to give you a sense how the painting progressed.
I started with a very loose wet-in-wet wash. This stage adds an element of unpredictability to the painting, but also creates some cohesion. As the painting progresses, I’m working background and foreground, adding many subtle washes to develop the forms.
Painted on Arches 140lb paper, 8×10″
The Beauty of Bulbs
|
What amazes me about amaryllis is the fact that a homely brown sphere the size of a softball can contain within it the potential for bold red blossoms to burst forth from its interior with a minimum of effort on my part. How incredible! I realize that onions and garlic are capable of similar feats, but it’s hard for them to compete. This is the last day that this particular bulb will fit on an 8-inch page at full size— it’s growing at about a half-inch a day— but you can be sure I’ll revisit it in a few weeks when the flower will make another beautiful subject.
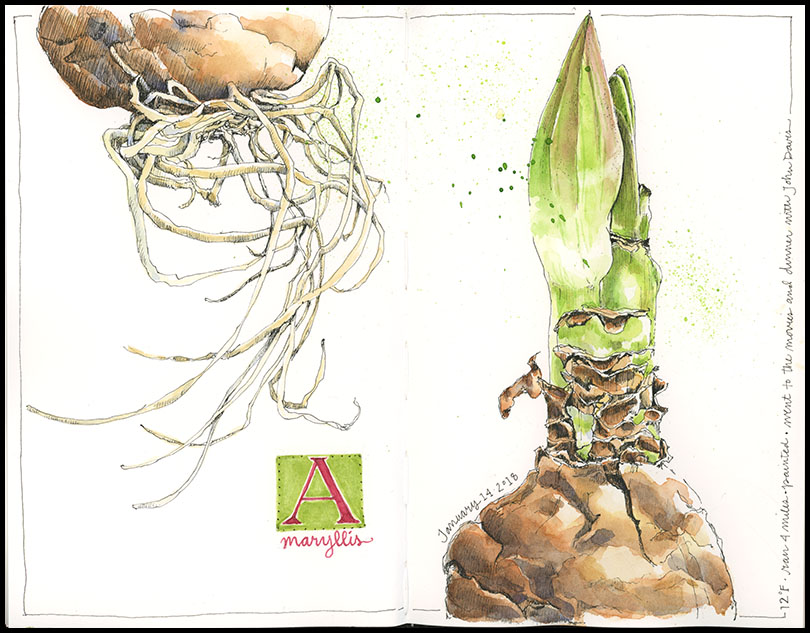 Tips and Techniques: Let me start with a confession: I drew the amaryllis to avoid working on a complicated owl painting I started last week. I started the owl to avoid working on a commission for a house painting I’m struggling with. So, my tip is that when you’re out on an artistic limb, it can be helpful to return to techniques you know well (for me, drawing in ink then adding watercolor). You may just regain the confidence you need to push yourself back out on the limb.
And another tip: Did you know that you can load watercolor paint into a dip pen? That’s how I created the letter A. Mix the paint and load the nib with a brush. Give it a test run to be sure the paint is flowing and you’re good to go. You can even change up the color midway through writing if you want. Fun! |


