Spring Mornings
I love going outside on spring mornings to discover what birds have migrated north overnight. Every day brings new species and new songs to the woods and fields around us. Tree swallows came back a few weeks ago and I always love seeing their flash of blue and hearing their twittering song as they fly overhead. They typically hang out for a week or two before settling down to nest in one of our bird boxes. The rose-breasted grosbeak, on the other hand, just passes through. A single male spent only one day in our yard. Lucky for me, I was working from home that day and enjoyed watching it at our feeder before it moved on.


Tips and Techniques– I’d like to paint all of the migratory birds that pass through or nest here, but there’s no way to manage it while working full-time. Still, I like considering a series like this and these two paintings reflect some experimentation with a style that might work to keep the focus on the bird while not fussing with much background. If you’ve ever done a series, I’d like to know what subject you chose and how you considered developing a consistent thread that unites the pieces. Next on my bird list are the yellow warbler, prairie warbler, and common yellowthroat, but I need to get going before everything is fully leafed out and I can’t find them!
Fiddlehead
I spent the entire afternoon yesterday hiking and sketching ephemeral wildflowers and ferns at Bartholomew’s Cobble, a nature preserve in Sheffield, Mass. What a treat! Bloodroot sprang from rocky limestone ledges, and Dutchman’s breeches, hepatica, and red and white trillium carpeted parts of the forest floor. My wildflower sketches remain unfinished, so I have only these fiddleheads unfurling by the banks of the Housatonic River to share. How I wish you could go there in person to see them for yourself.

New class coming up: Watercolor for Beginners, June 6 and 13– Learn the fundamentals and techniques you need to begin painting successfully. The class is geared for beginners and for those who may have missed learning foundational skills.
Tender Greens
There’s a fleeting moment each spring when shoots emerge and recently barren ground begins to turn green. In another week these sprouts, these plants marching across my page, will be twice as tall and unfurling fast. If I had to wager, I’d say that Christina Rossetti (1830-1894) wrote her poem, Spring, in mid-April. When “blows the thaw-wind” and “drips the soaking rain,” she celebrates the season’s change in “tips of tender green.” I was pleased to find her words, connecting across time and place, resonating still.
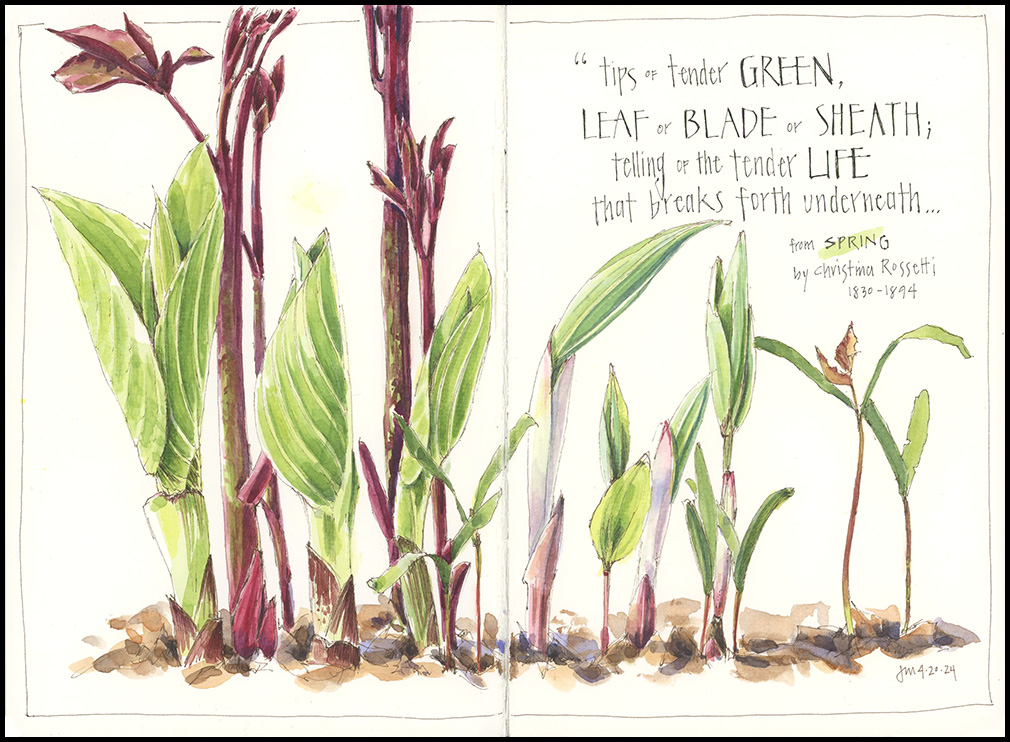
Tips and Techniques– Experiment with mixing different combinations of warm and cool yellows with various blues to see what greens you like best. I often paint test strips and keep them for future reference when trying to choose the right green for a particular subject. Notice, too, how much red appears along with spring greens. You’ll often see it in stems and leaf tips. I find Alizarin crimson to be the perfect choice for the ruby red shades at this time of year.
Springing into Yellow
I am sending you a bit of whimsy today as we spring into the return of yellow forsythia and daffodils, goldfinches wearing their summer suits, and—soon—the songs of warblers echoing in woods and fields. I painted this as a demo for my class Painting the Colors of Spring, thinking it would be fun for participants to try perching a bird on an atypical object. I hope you are enjoying spring unfolding wherever you may be.
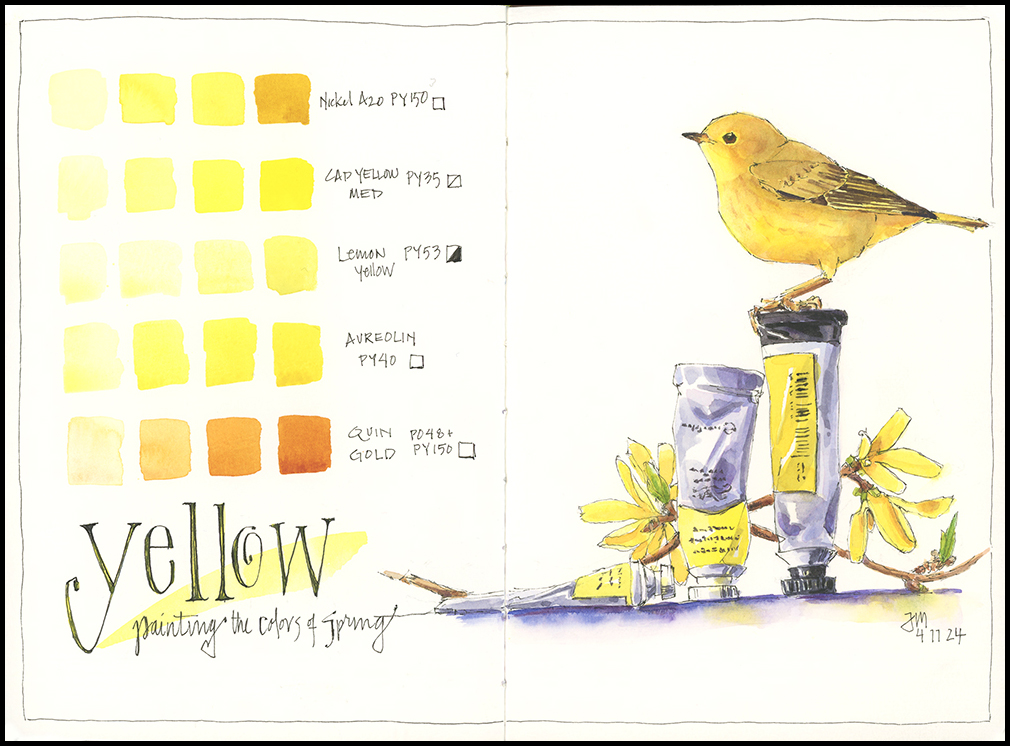
Tips and Techniques– Yellow can be a tricky color to paint since its value range is so light and shadow colors can easily become too heavy. I painted this mainly with cadmium yellow medium, cobalt blue, and permanent rose. (Hansa yellow medium is a good choice for a warm yellow, too, but I was out). I chose that combination because neither the cobalt nor the rose tends to overwhelm the yellow. You can push mixtures toward bronze, green, gold, or brown, and the cobalt and rose together make a nice purple complement to the yellow.
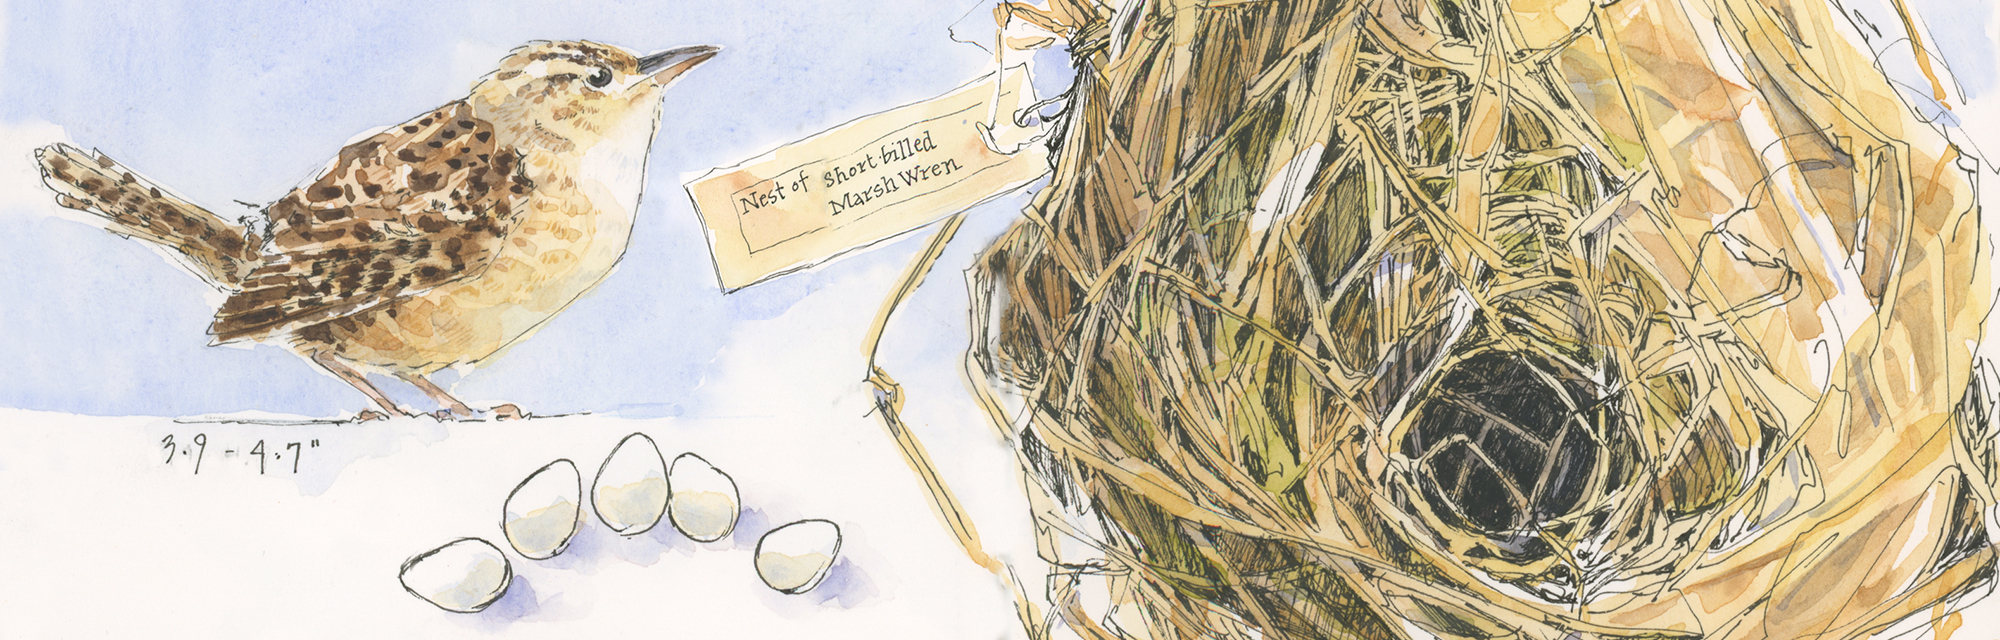
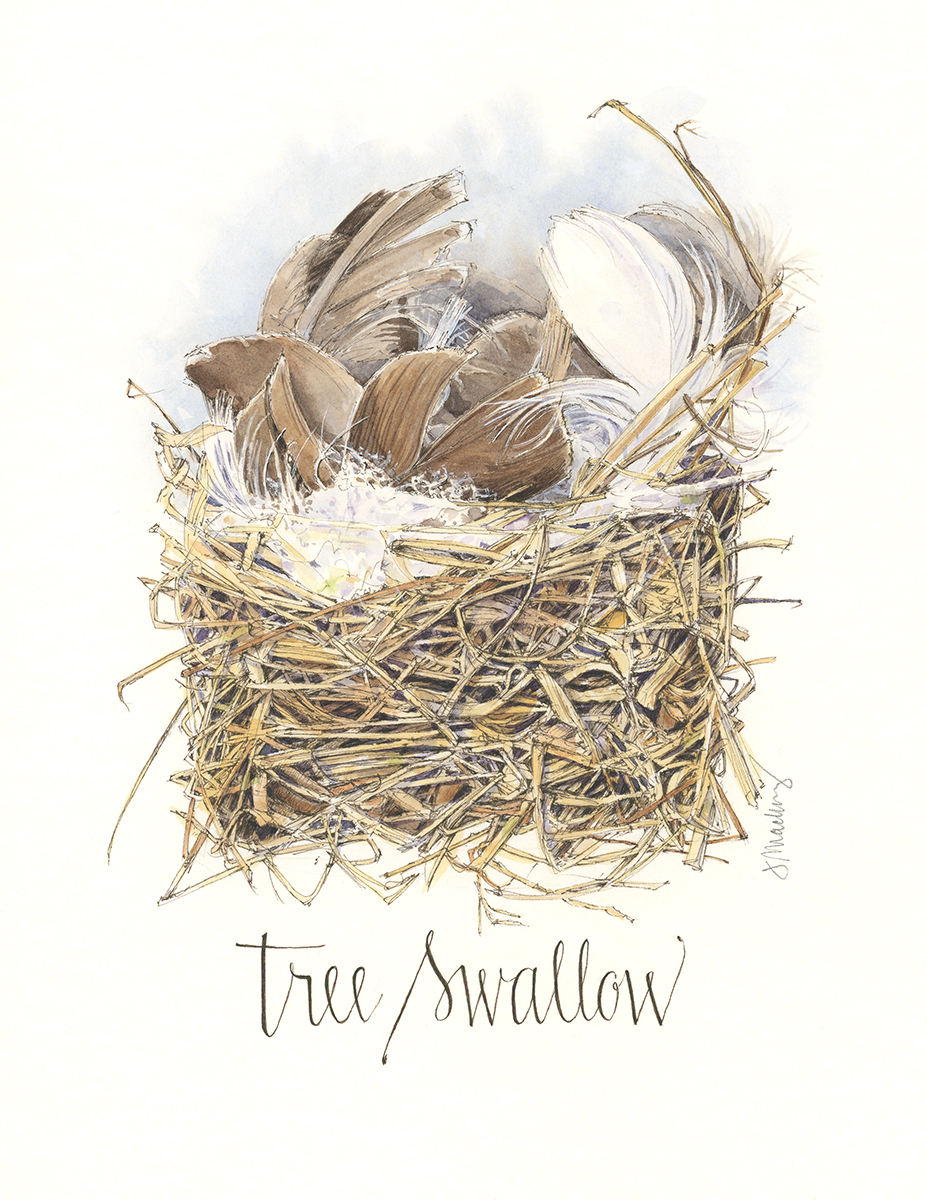
Renewal
It’s the season of waiting here in New York: waiting for warmth, waiting for blossoms, waiting for green, waiting for birds to return. But it’s the season of renewal, too, as spring unfolds with song, color, and light. I’m celebrating Earth’s turning toward the sun with this tree swallow nest and the promise of eggs and new life. Wishing you the same.
I’m excited to be sharing techniques for sketching nests and other nature subjects during Botanical Art & Nature Sketching Retreat. This weekend workshop takes place Nov. 8-11 in New York’s beautiful Catskill Mountains at the Ashokan Center and includes instruction with Wendy Hollender, Lara Call Gastinger, Giacomina Ferrillo. What a lineup! Visit Draw Botanical to book your spot.
Unshelved
Most museums have far more of their collections tucked away behind the scenes than on display. Used primarily for research—or often just sitting in temperature-controlled storage—the public rarely gets a look. But as luck would have it, my visit to California coincided with an exhibition called Unshelved at the San Diego Natural History Museum (The Nat). On display were birds, mammals, and insect specimens in display cases that harkened to museum displays of yesteryears, before museums decided to shelve specimen cabinets in favor of exhibits that placed species in greater context of the environments in which they are found. Unshelved suited my old-school natural history sensibilities perfectly. I tucked into a corner with seldom viewed bird nests and hummingbirds and couldn’t have been happier.

Tips and Techniques- When sketching in a museum be prepared for two givens: using limited materials and peering eyes. Most places will allow sketching in pen or pencil, but not paint. Sketch out the main things that interest you and take a few photos to work from later. Expect visitors to be curious about what you’re doing. Some will simply peek and move on, while others will comment. I especially love it when kids take interest. I use the opportunity to ask whether they like to draw or to tell me about their favorite things in the collection. If you can let go of feeling self-conscious, those moments will become a precious part of your experience.
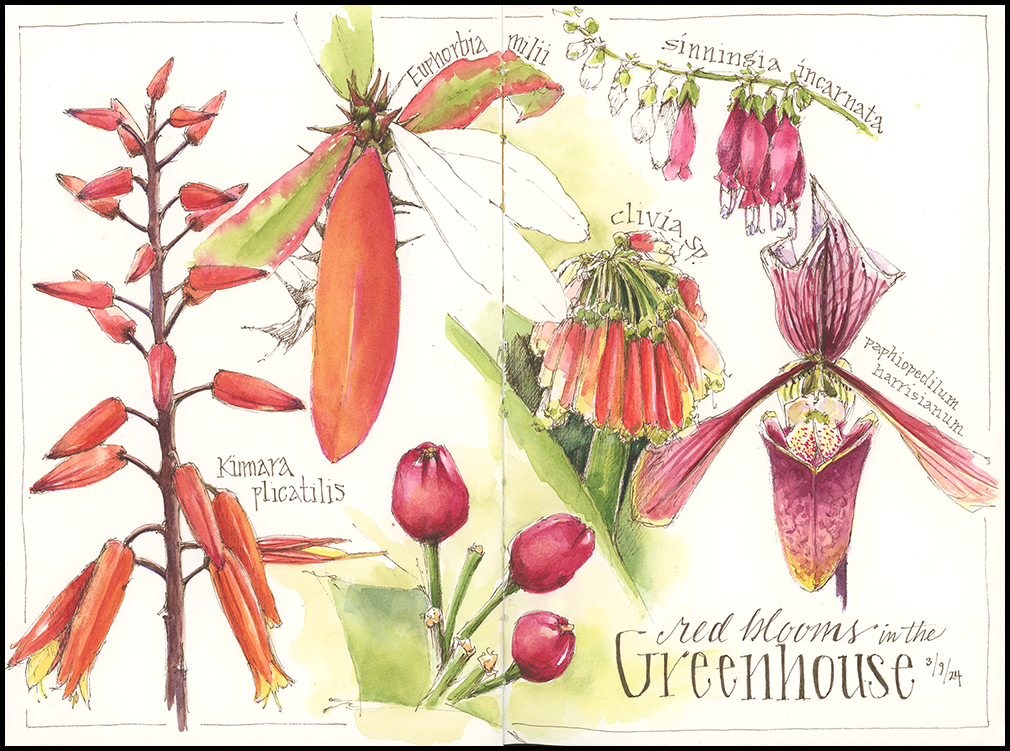
Red Blooms in the Greenhouse
I met three artistic friends last weekend for a few hours of sketching and good cheer at the Lyman Conservatory at Smith College in Northampton, Massachusetts. It’s always a treat to be surrounded by greenery during the transition from winter to mud season. As it turned out, hundreds of other people felt the same way. The place was packed. I had to be careful in the cactus room not to back into spines when letting people pass me in the aisles. And when I thought I had found a good spot to tuck in amidst the tropical plants, an acapella group arrived to serenade visitors. The music was lovely, but crowds soon followed. I wouldn’t trade my visit, or the chance to enjoy red blooms in the greenhouse, but I’ll appreciate the solitude of painting along the roads and fields once again.
Tips and Techniques– Focusing on a single color is a great way to explore different hues and even test pigments that you may not use much. Mix your primary color with hints of other primaries as well as secondaries to push the dominant color in different directions. For example, mix reds with yellow, blue, green, or brown to see what variations you get. The goal is to get to know your paints, and figure out which ones mix well together and which you like best.
If you’d like to take a deeper dive into color, join me for Painting the Colors of Spring, starting March 28.
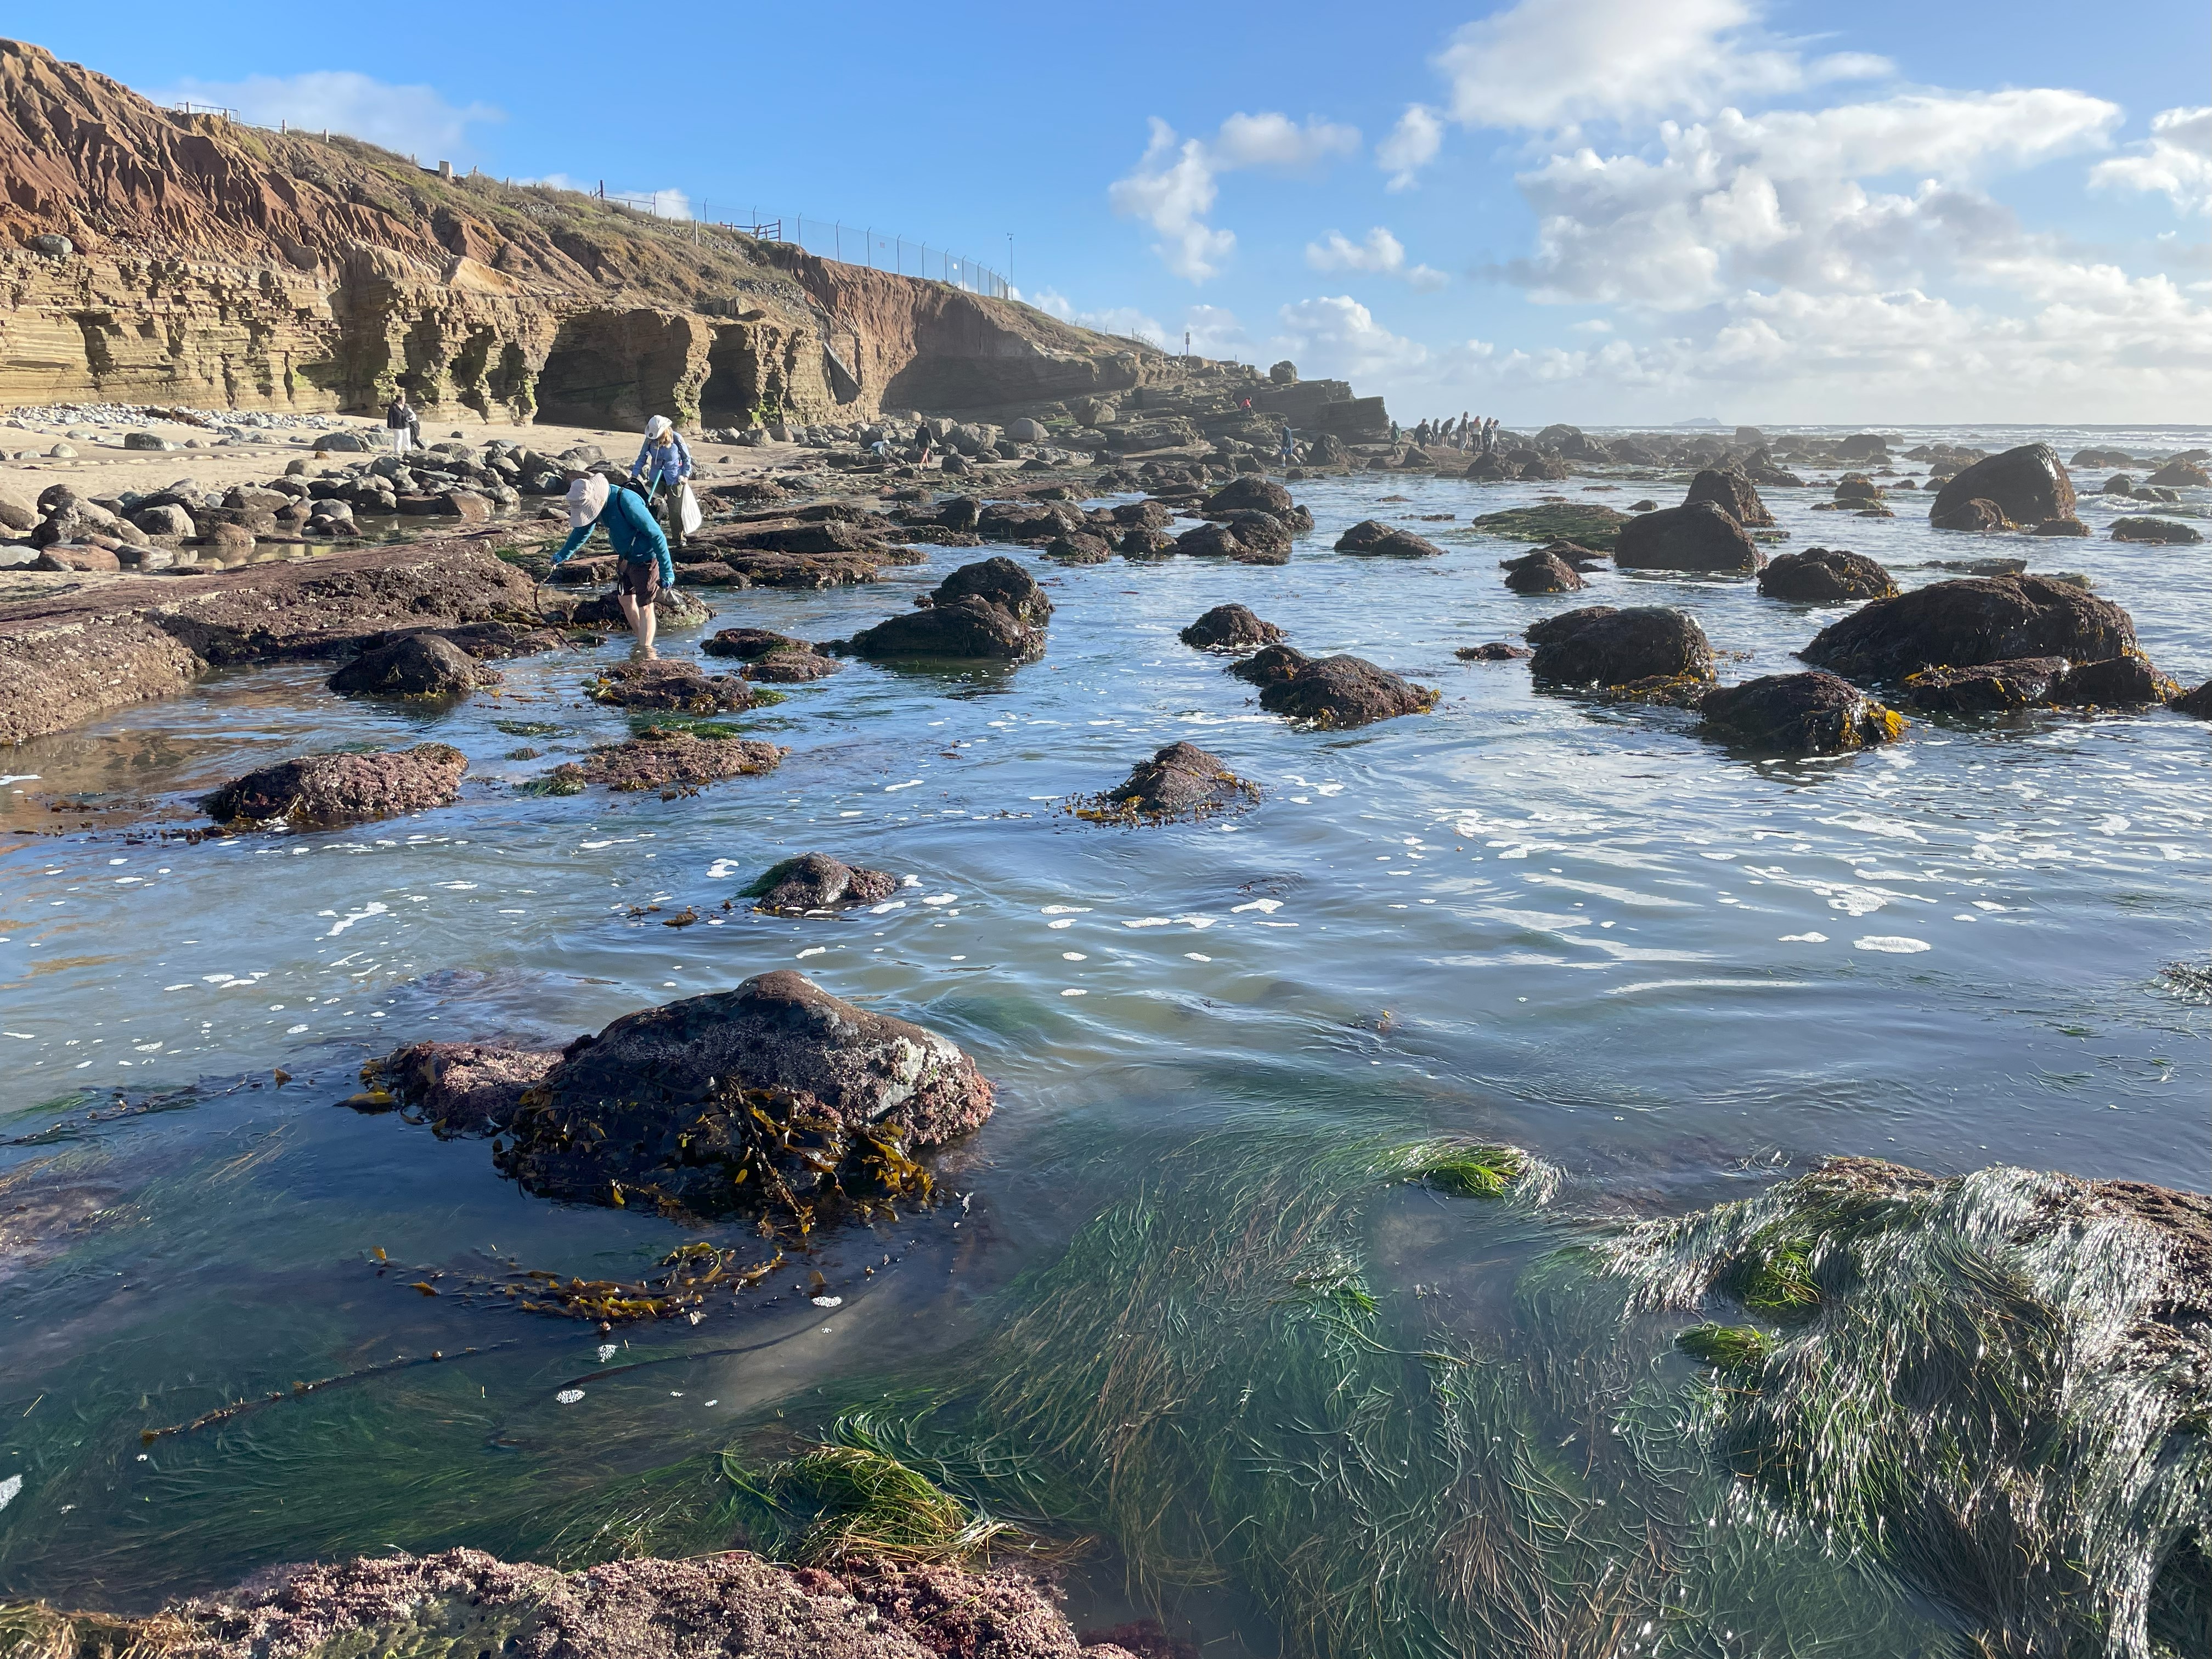
King Tide
While visiting southern California last month we took time to explore the tide pools at Cabrillo National Monument. This is one of the best protected rocky intertidal areas in California and our timing was perfect. Sun, moon, and Earth aligned during our visit to create a King Tide, a twice-yearly occurrence in which the low tide is nearly two feet lower than normal. This exposes far more of the rocky shore and reveals a greater diversity of the fascinating creatures that live at the edge of the sea.
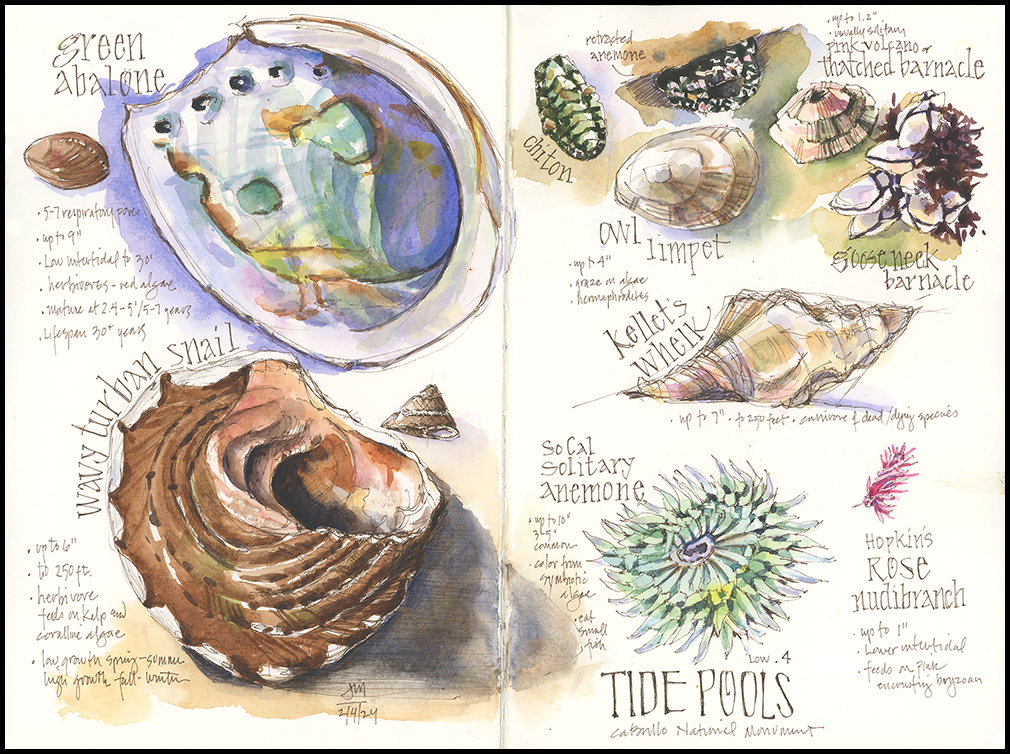
Tips and Techniques– I love sketching while exploring tide pools and encourage you to try it if you have the chance. Though conditions are challenging, the sense of discovery and immediacy is exciting—and those qualities often come through on the page. The rocks are slippery, the water frigid. Creatures are hiding to try to stay damp and safe until the tide returns. And if you explore the outermost pools where sea and land meet, you need to watch the waves and the time to be sure your route back isn’t covered in water from the incoming tide. I carry my sketchbook and a pen in a plastic bag in my backpack, along with a small ruler, and a bandana for drying my hands. I accept that my sketches will be messy—that comes with the territory—and I add text and watercolor later from photos and memory.
It’s Complicated
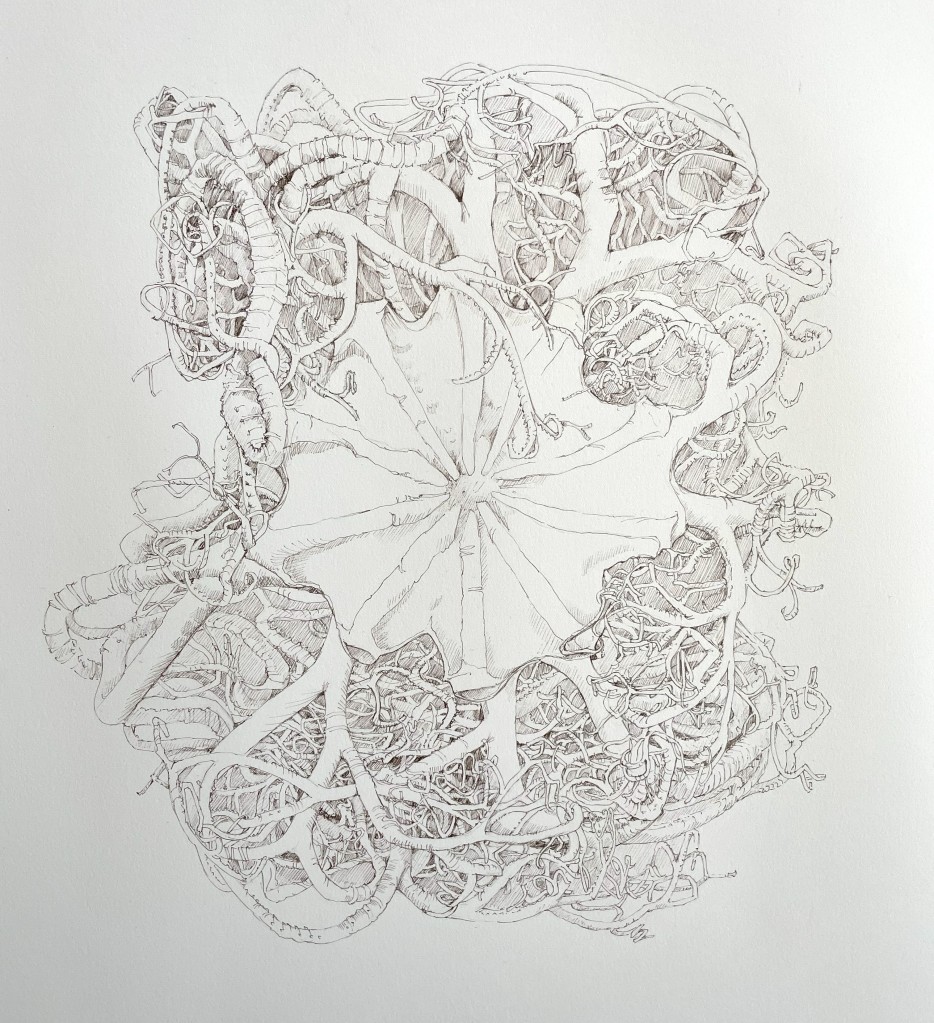
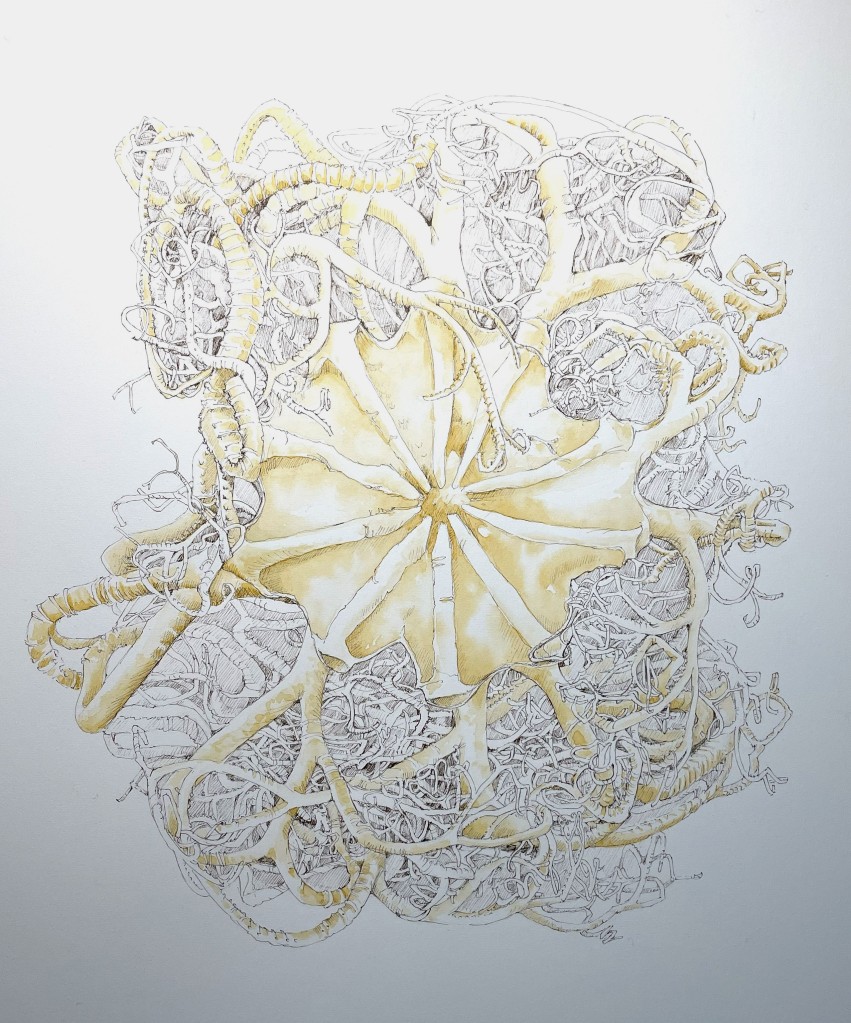
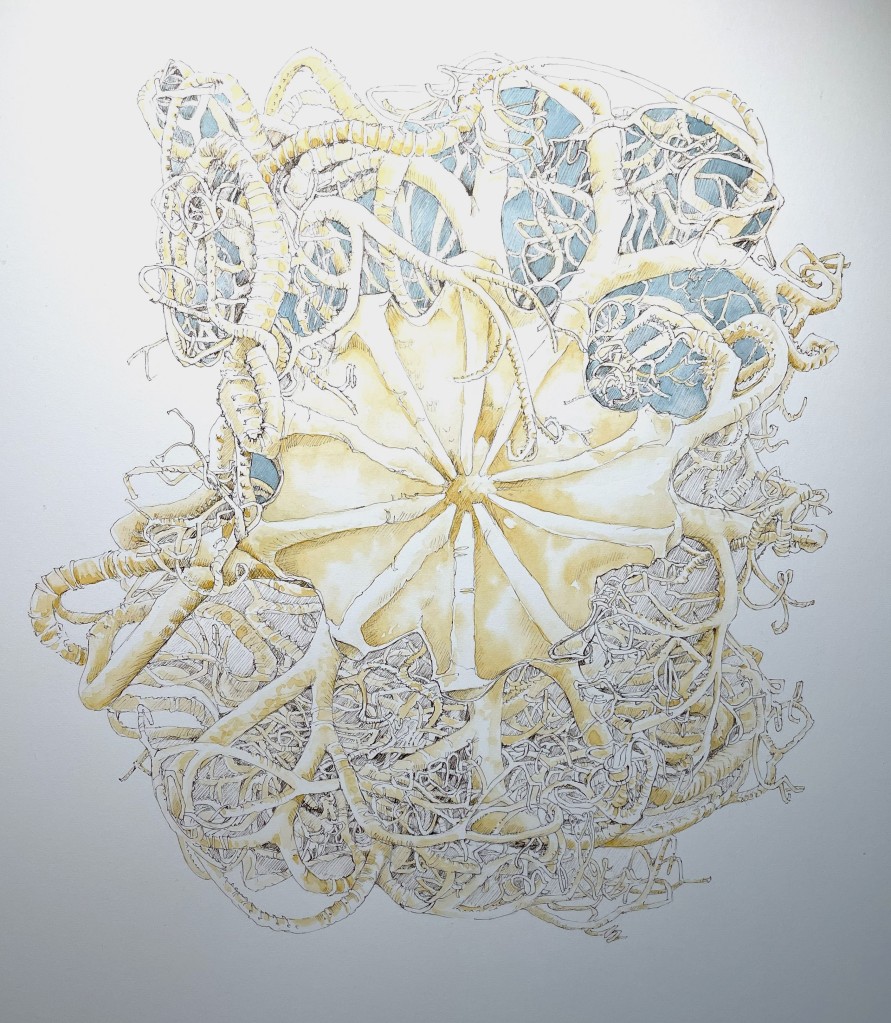
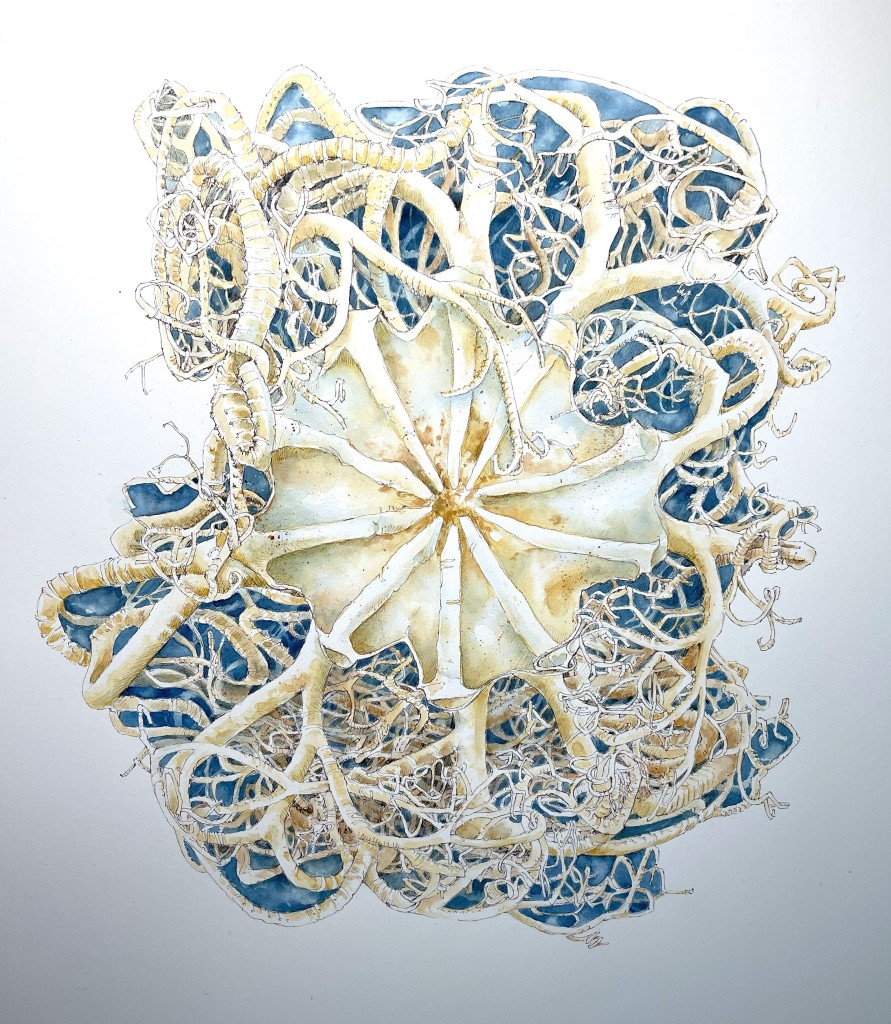
Consider the brittle star – a simple marine creature comprised of a central disk with five arms extending outward to gather bits of food. Now multiply each arm by two, and two again, and again, and again…and you have a magnificent basket star. I saw this one, Gorgoncephalus eucnemis, on my recent visit to Scripps Institution of Oceanography’s Benthic Invertebrate Collection in La Jolla, California, and I was entranced. These creatures live in deeper ocean waters so, unless I take up scuba diving, I will never see one alive. I think it might be the most complicated thing I’ve ever drawn.
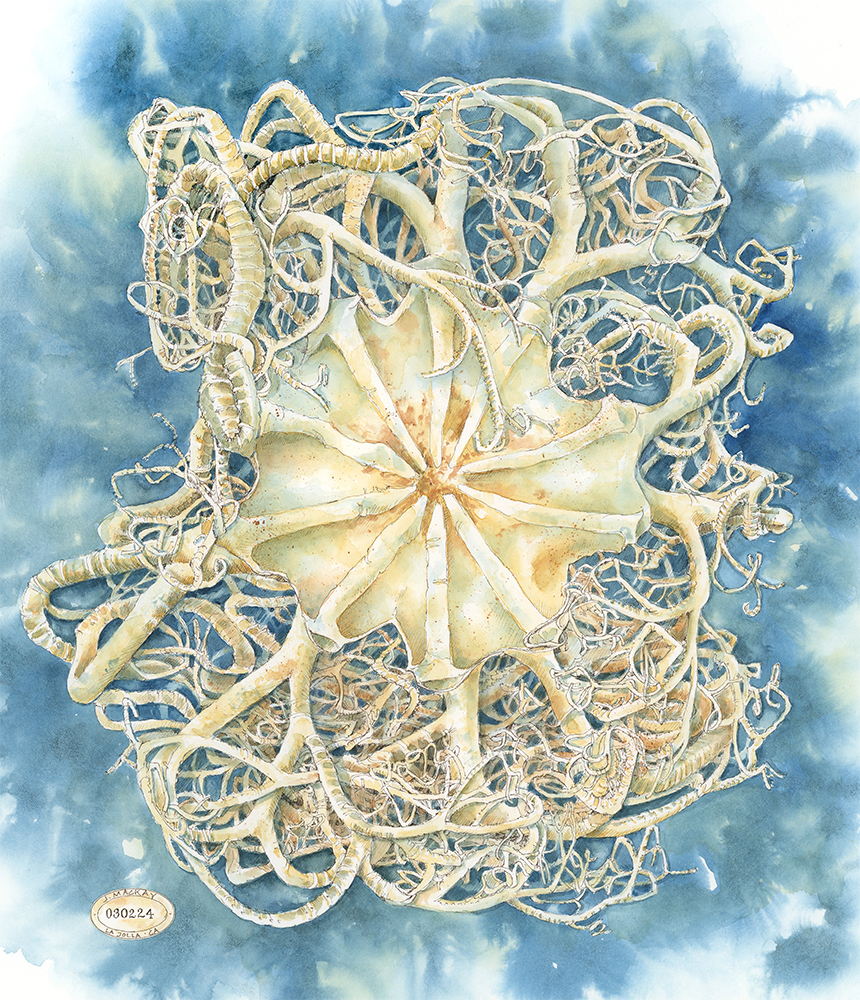
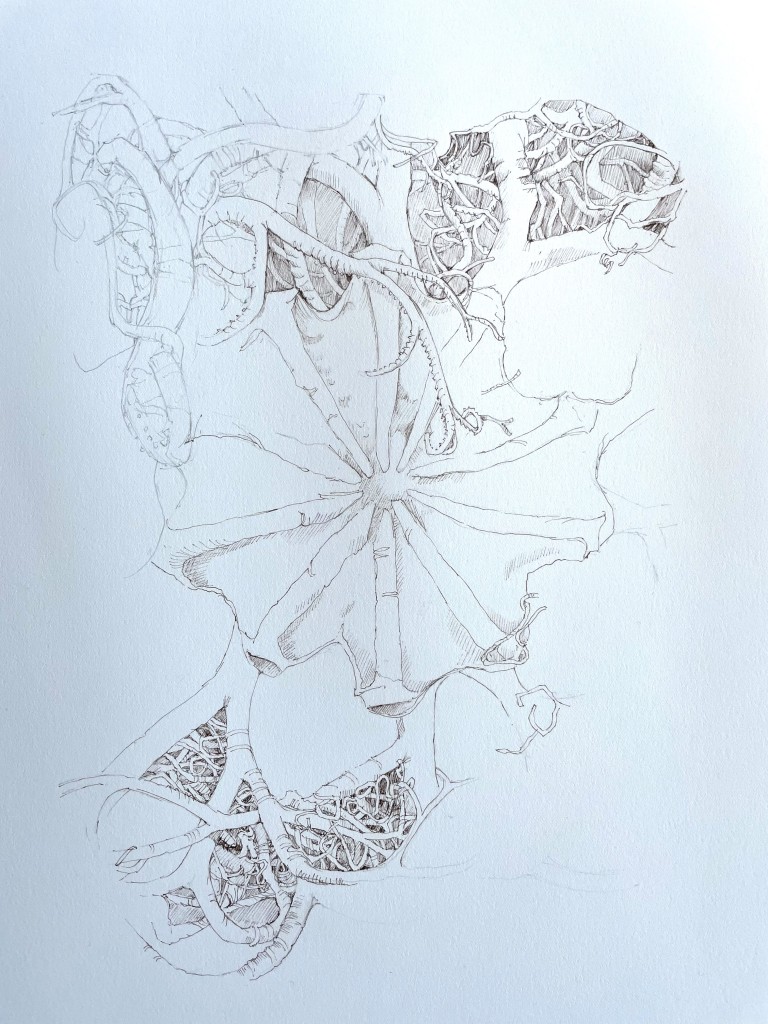
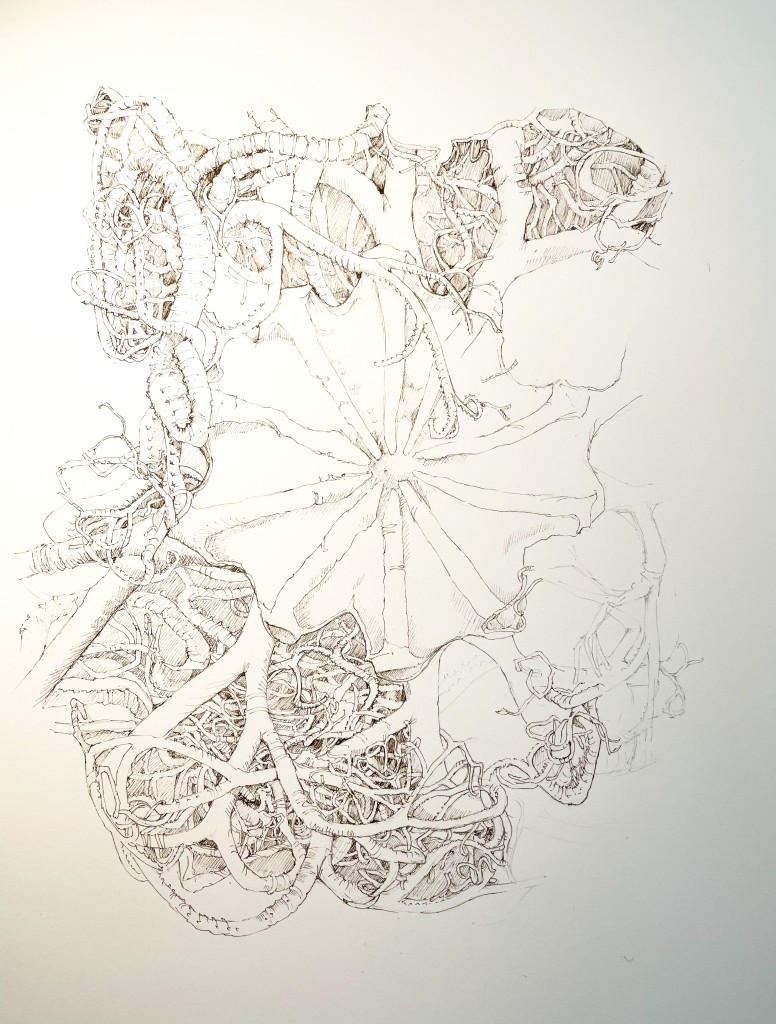
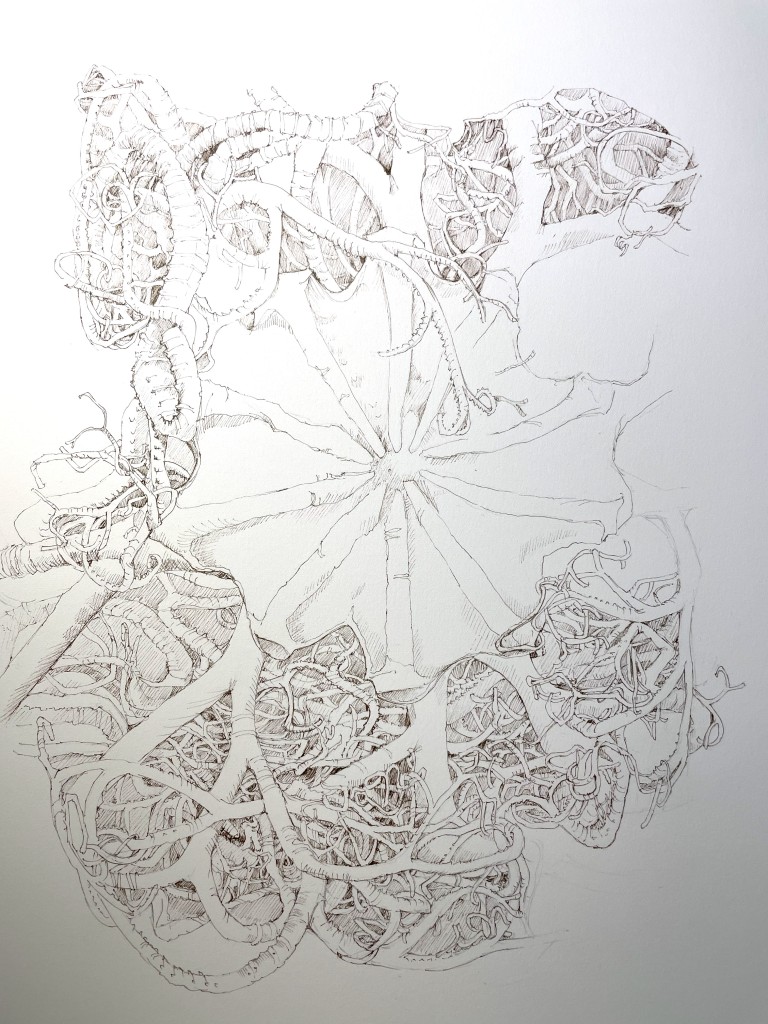
Tips and Techniques- When faced with a complicated subject, break it down into manageable pieces and take your time. I worked on this for more than a week, an hour or two at a time. My prior work painting tangled bird nests and tree branches certainly helped. But this was larger and more complex. Were I to do it again– and I might— I would paint each section in turn, rather than using ink to help define the spaces. Here’s a look at my progress from start to finish (sorry the photo quality isn’t better, the lighting wasn’t great).


Check it out! Botanical Art & Nature Sketching Retreat with Wendy Hollender, Lara Call Gastinger, Giacomina Ferrillo, & Jean Mackay, Friday, November 8 – Sunday, November 10, 2024, Ashokan Center, Olivebridge, NY
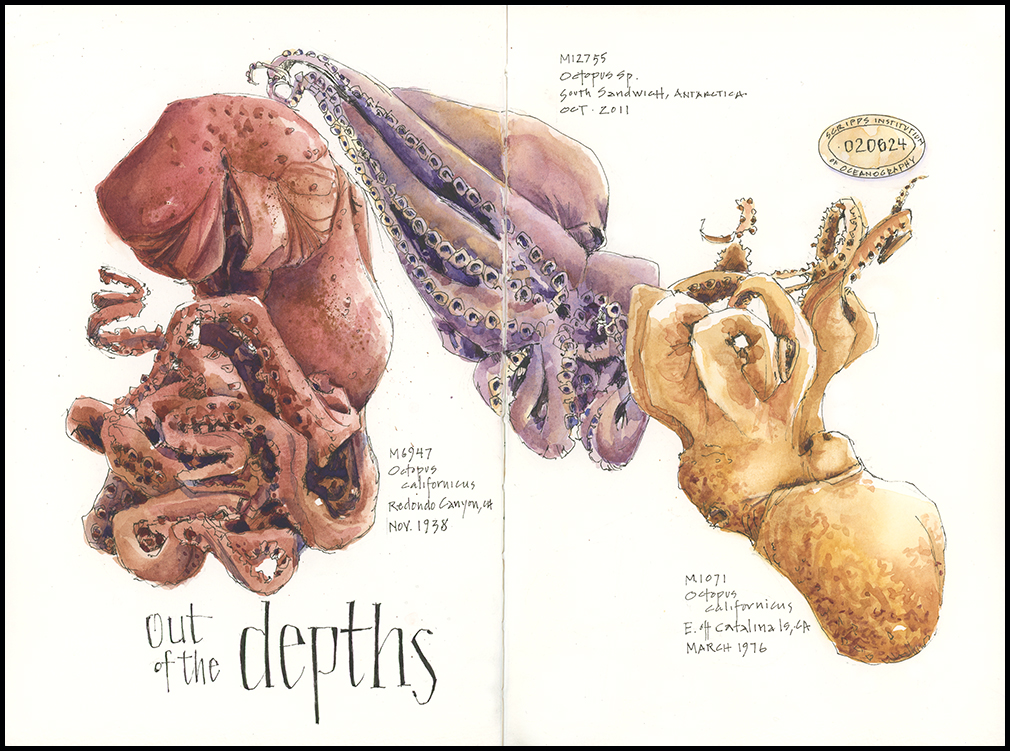
Out of the Depths
Row after row, jar after jar: 55,000 containers representing 800,000 specimens and 7,600 species from the world’s oceans lay in front of me. Like a kid in a candy store, I had to choose. Giant crabs, exquisite sea stars, ghostly squid, mollusk shells of all sizes and stripes—these creatures without a backbone make up the Benthic Invertebrate Collection at Scripps Institution of Oceanography. On a recent trip to Southern California, I arranged to spend a few hours sketching there, and what an amazing opportunity it was. After roaming several rows of otherworldly organisms, I decided to focus on octopuses. Admittedly, there is something slightly grotesque about dead sea creatures preserved in jars of alcohol, but that is countered by the their continued magnificence, the wonder of studying them firsthand, and the challenge of giving them a new life on paper.
New class: Registration is open for Painting the Colors of Spring beginning March 28, online at Winslow Art Center.