
Starting Over
People often ask me, “What happens if you make a mistake in your journal?” Sometimes I live with it, sometimes I work through it until I can correct it, and sometimes, it’s best to start over. That was the case with this page, which started out as a watercolor sketch of mountain laurel trees in a dappled afternoon woodland. I jumped into it without any drawing and never recovered. So I glued an old dictionary page over the laurel to experiment with painting on book paper– something I’ve long wanted to try. This brought an immediate sense of relief and new possibilities.
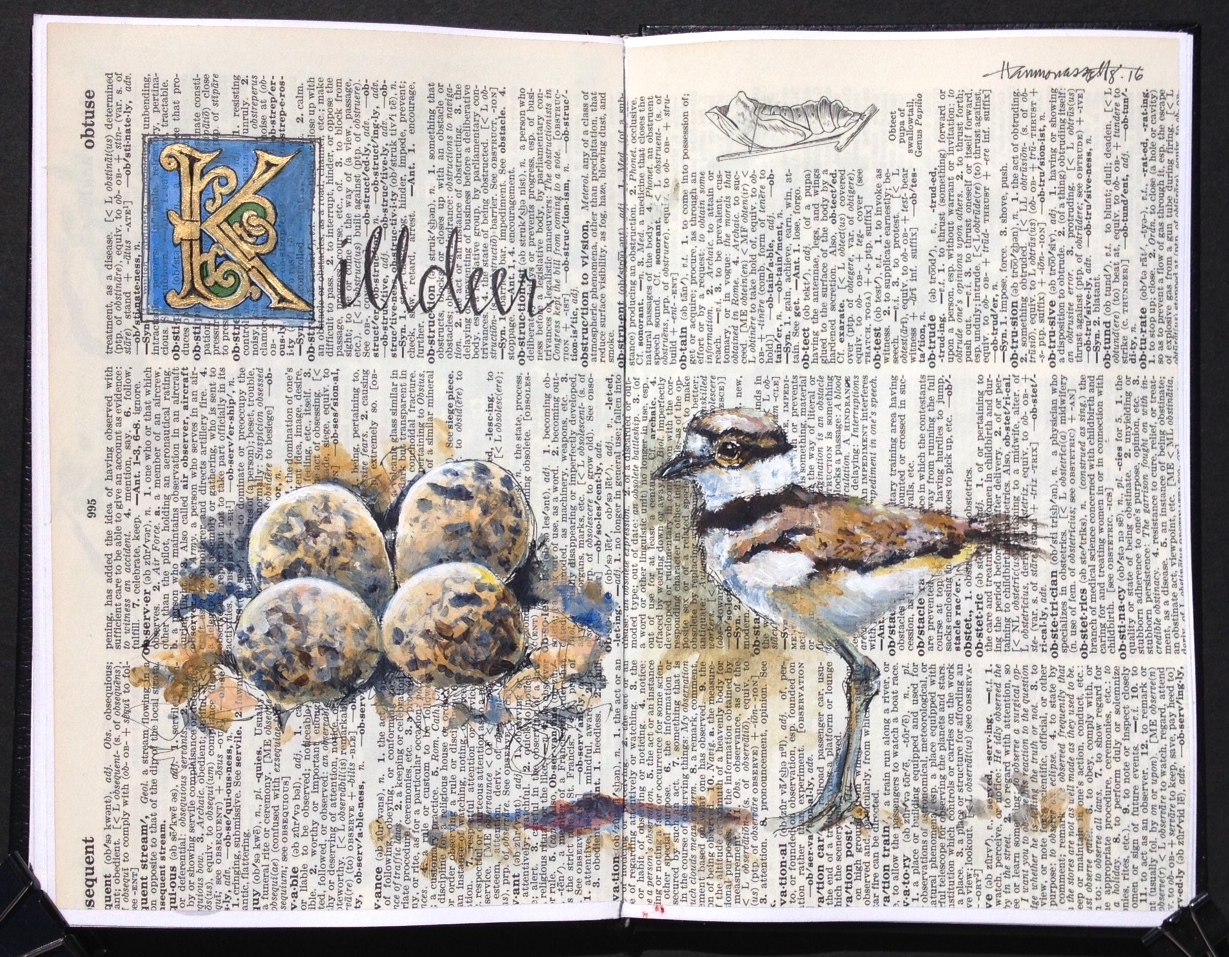
Click to view larger. Acrylic and ink in Stillman & Birn beta sketchbook collaged with old book paper.
I found a killdeer nesting on the beach two weeks ago and went back to check on it again this week. These robin-sized shorebirds nest right in the open– sometimes at the edge of parking lots or ballfields. The adults sit on the nest for nearly three weeks and when the young hatch they are fluffy and mobile. Once their feathers dry, the chicks totter around after their parents in search of food– a sight I hope to see on my next visit.
A note about painting on book pages: Think of it like working on toned paper. Subjects with strong lights and darks will work really well. The tricky part is that it’s really hard to see pencil or pen lines when there’s a lot of text. Watercolor is my usual medium, but book paper is much too thin for it. Gouache, acrylic, or colored pencil are better suited. Check out artist Alissa Duke’s Exhibition Preview “Can you draw in books?” to see some outstanding examples.
Sketchbook and a Pen
There is something really satisfying about going out with the most basic of sketch tools: paper and pen. I love the flow of lines, of ink on the page, of forms taking shape. These magnificent old beech trees were perfect subjects. I found the first one late Sunday afternoon on the banks of a river and the second two days later in a cemetery. It took me about an hour working on site to make each drawing. Back at home, I couldn’t resist adding a touch of color to to the page. What about you? What are your go-to artist tools?
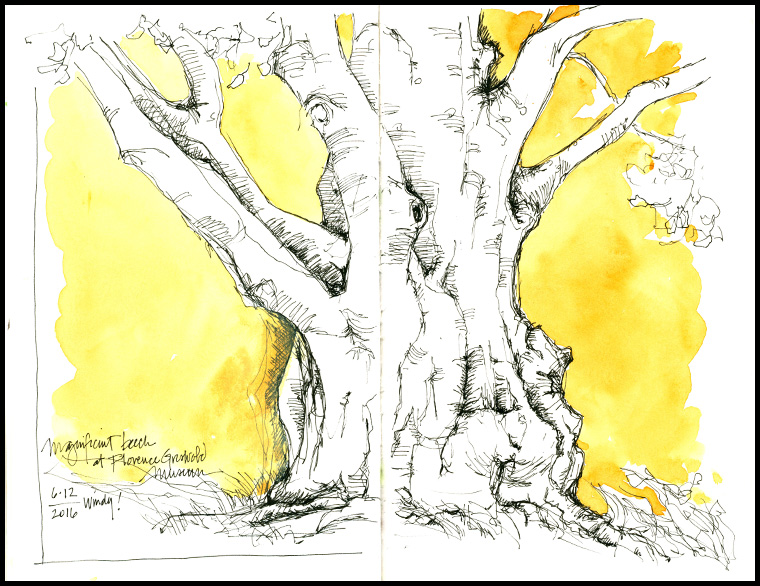
European Beech (Florence Griswold Museum, Old Lyme, CT), Micron 02 pen in Stillman and Birn beta sketchbook.

European Beech (In Memoriam Cemetery, Wallingford, CT), Micron 02 pen in Stillman and Birn beta sketchbook.
Hog Island Journal
I drew on 15 years of journal entries to make this piece of art for an exhibit marking the 80th anniversary of the Audubon Camp on Hog Island in Muscongus Bay, Maine. I have been exploring the island once a week each summer since 2001, first as a camper, then as program director for Family Camp, and for the past three years as an instructor and program director for a week-long workshop called Arts and Birding. Many of my favorite journal pages capture treasured experiences, memories and discoveries of marine life, birds, spruce forests, and rocky shores.

click to view larger; watercolor and ink on Fluid 100 cold press paper
Since 1936, the Audubon Camp on Hog Island in Maine has offered environmental education programs for adults, teens, families and conservation leaders. Here’s a look at some past journal pages. If you are in Maine this summer, stop by the Project Puffin Visitor Center in Rockland to see the art exhibit inspired by Hog Island.
Hidden in Plain Sight
When I was a kid, my grandmother used to play “hide the thimble” with my sisters and me. A variant of hide and seek, she’d hide a thimble or other small object in plain sight and we’d try to find it. The thrill of discovery fueled many rounds of play, until my grandmother’s hiding places (and likely her patience) were exhausted. Lately, I’m playing a similar game with birds. They hide their nests—often in plain sight— in ways that defy detection. Camouflaged eggs and nests and stealth behavior are critical to their strategy. A sharp eye and keen awareness are keys to mine. Still, I walked by this song sparrow nest many times before noticing it, tucked into grass and clover. As you can see, it was a beautiful find.

Song Sparrow Nest, 8×8”, watercolor, 2016. Click to view larger.
The painting was made from a photo, quickly snapped when I found the nest. I prefer painting from life, but leaving the nest undisturbed was critical in this case.
Spring Unfurls…Fast
I anticipate spring’s arrival for most of February, March and April, eager for its fresh greens, new life, and abundant sketching opportunities. It arrives slowly at first, with skunk cabbage, red-winged blackbirds, and daffodils. But by mid-May, it takes off like a rocket and I can’t keep up. I’ve been sketching and painting in snatches of time—10 minutes here, half hour there—due to an especially hectic work and family schedule this month. Here are a few of those snatches:

Click to view larger

The carriage barn at the first home in America of artist John James Audubon in Mill Grove, PA. Click to view larger.
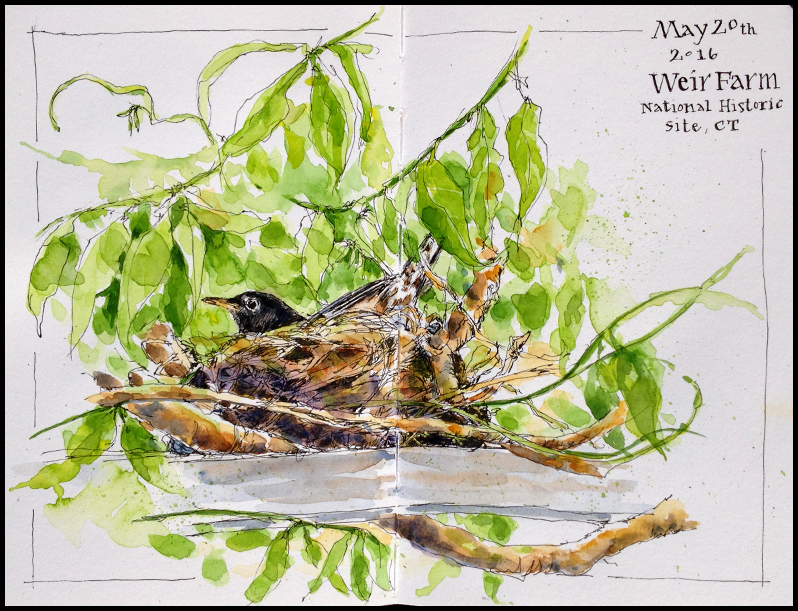
Robin’s nest on the visitor center porch at Weir Farm National Historic Site in Connecticut. Click to view larger.
Outdoor Canvas
I’ve been creating a new perennial garden this week, which has left little time (or energy) for painting. Still, I had to sneak in a page of plants to record what’s going in the ground. I love taking the plants out of their containers and seeing the roots all wound round or tangled. I could get lost sketching them in detail, but then my garden would still be sitting in pots. So I am content (for now) to use my yard as an outdoor canvas, and to sketch with soil and plants instead of paint and paper, knowing that this garden will provide inspiration for many future paintings.
Why Sketchbooks Work
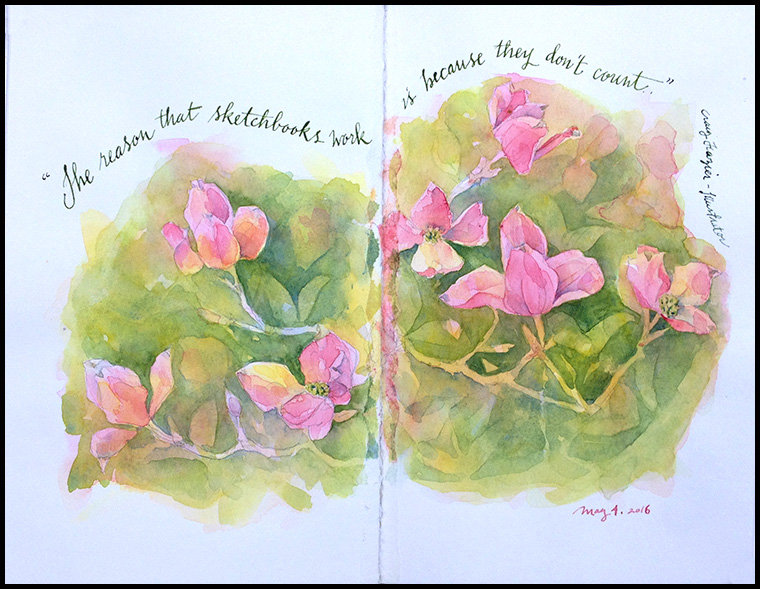
“The reason that sketchbooks work is that they don’t count.” –Craig Frazier, illustrator
The beauty of a sketchbook is that it is simply that: a sketchbook. It’s a place to do what you want as an artist. It is ideas and experience and creativity and experimentation crammed between two covers. One blank page after another, it becomes something extraordinary when filled earnestly and honestly. Yet, in the end, it doesn’t really count. And that is a beautiful thing, too. There is no price tag, no commission, no gallery wall waiting for it. It’s just for you…and so, it is one of the freest places for an artist to make a mark.
Click to view larger.
This page was an experiment in capturing dogwood blossoms using “negative painting” techniques. I like the effect and look forward to trying it again on higher quality paper. Unfortunately, the pages of this spread came stuck together with a bit of glue seepage at the gutter, so it’s pretty rough there. But, it’s just my sketchbook, so it doesn’t really matter.
Bluebird Post
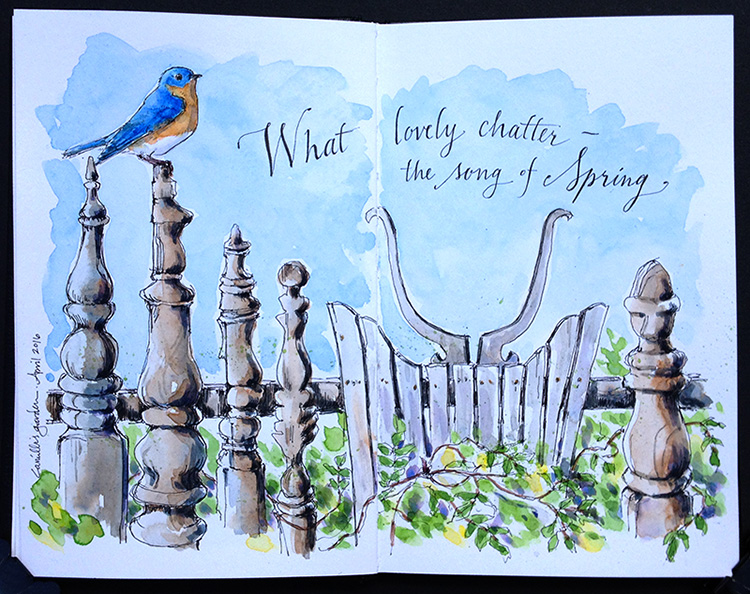
It’s no wonder the bluebird is associated with happiness. This lovely thrush is a harbinger of spring, chattering its warbled song as soon as the days start to warm. I have had the good fortune of seeing and hearing bluebirds frequently over the last few weeks. And whenever I do, I can’t help but feel grateful for its brilliant flash of blue and notes of good cheer. Thoreau was right: the bluebird carries the sky on its back—and glimpsing it is one of the simple pleasures of spring.
Click to view larger
A little more about this journal page: I love this quirky fence. Made of old bed posts by my friend Camille, it makes a great backdrop for her country garden. I was short on time and drawing fast directly in ink, so I didn’t quite get the proportions right. Maybe that was good. I didn’t fuss much with the painting either, which gives it a loose and casual feel…much like the garden and fence. Drawing and text were done with Micron 02 pen with a couple of washes of watercolor in a Stillman & Birn Beta journal.
Boxed in – Springing out
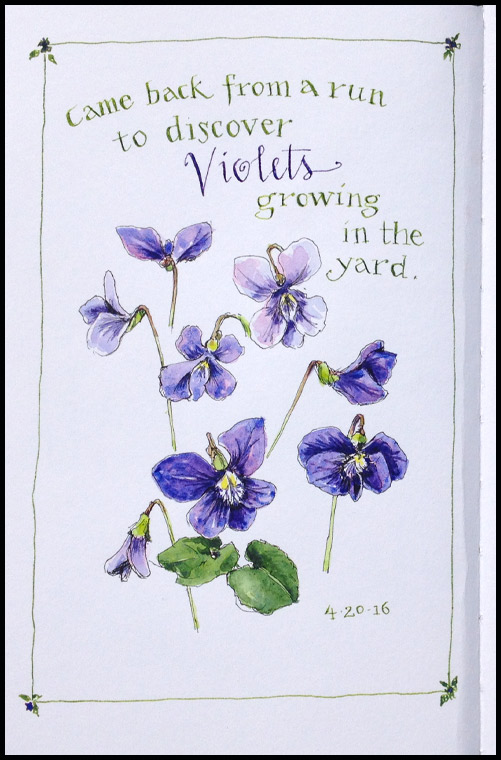
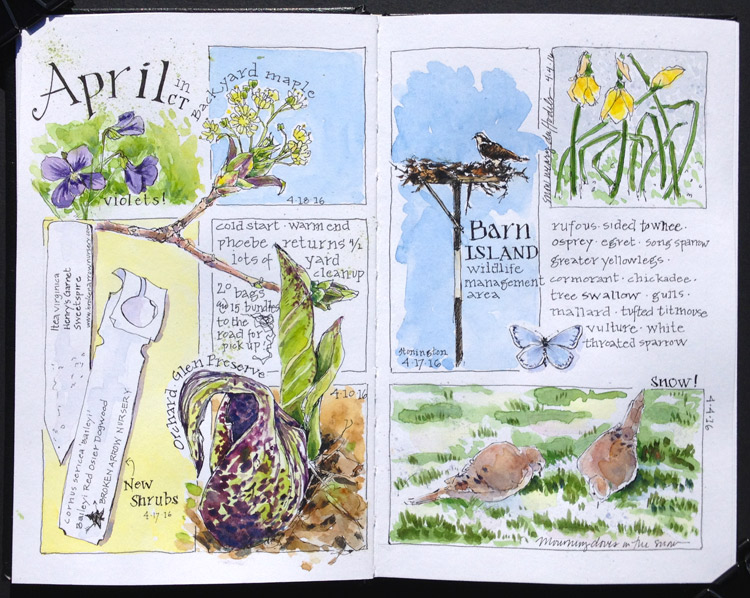
There’s always a lot happening in April—both in my life and with the seasonal shift to spring. I thought I’d try a grid in my journal as a way to make time for small sketches that would capture some of it. Unfortunately, I found myself feeling increasingly boxed in by the design. Instead of drawing more, I was drawing less. Then I found violets growing in my yard. So small, you’d think they would be perfect for a tiny box. But they seemed to beckon for more, which led me—finally—to turn the page and spring out.
And here’s April’s grid:
Click to view larger
Watercolor and ink in Stillman & Birn Beta sketchbook
Work in Progress
This page—like my diet—is work in progress, but you can see where it’s headed. And now that I’ve started this record of my downfall, I’m reluctant to find reasons to complete it. I ate with abandon most of last year and decided it was high time to change course and get back to healthier habits. The only problem is that I love desserts and snacking. The good news is that once I put these delectable downfalls on paper, I realized why the scale didn’t show progress last week, and I renewed my resolve to do better. So…hopefully, the page will remain unfinished for a good while longer.
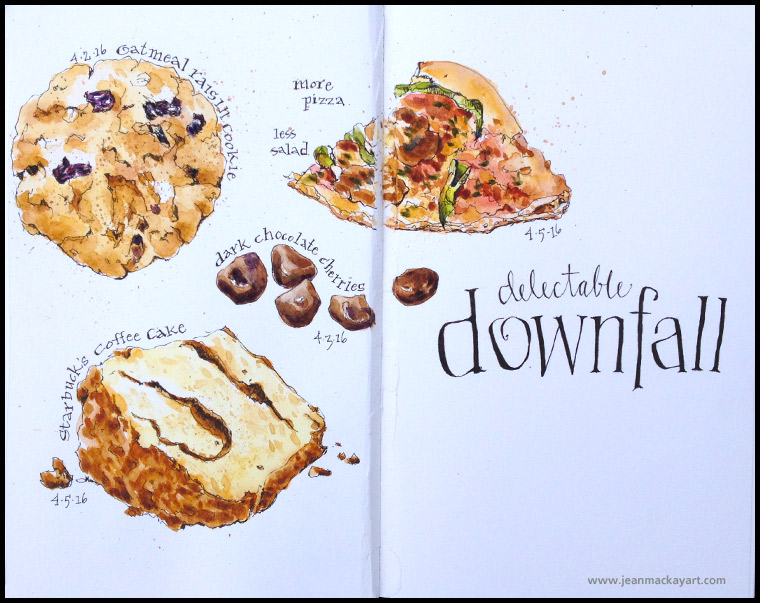
Click to view larger. Watercolor and Micron 02 pen in Stillman & Birn Beta sketchbook.

Thanks to Charlie O’Shields and the Doodlewash blog team for featuring me as a guest artist last week– and thanks to those of you who became fans because of the post! Doodlewash includes lots of fun sketchbook pages, product reviews, and guest artist features. Check it out!


