
Painting Exuberance
If last week I praised precision, this week I extol the value of putting some exuberance on the page. Especially when it comes to sketching your favorite subjects, or new-found discoveries in nature or, even better, both—some loose pen and paint and a splash of spatter can help to bring energy to your page.
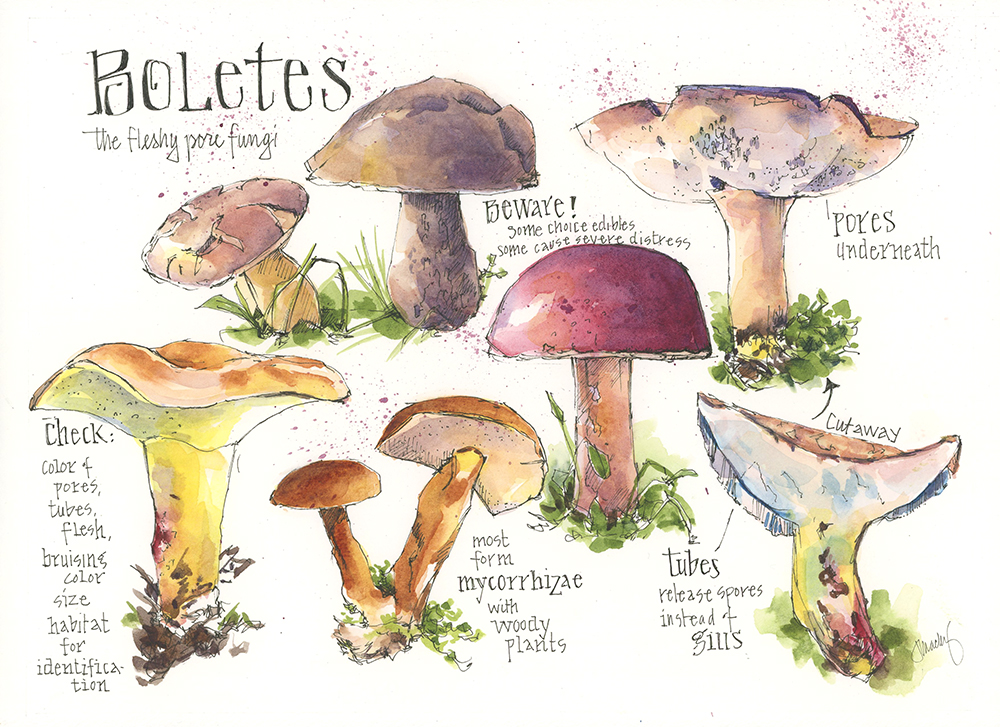
I painted this as a demo for a recent class on mushrooms, a subject deserving of enthusiasm. I’ve since headed to Maine, where I stepped out of the car and found black trumpets and violet cortinarius mushrooms pushing up through rain-soaked woods. I haven’t had time to paint them, but I have a whole week ahead to explore with sketchbook in hand. Expect more exuberance in the paintings to come.
In Praise of Precision
It’s nearly mushroom season here in New York, the only time of year that I’m rooting for humidity and rain. I typically work fast to keep up with sketching the variety of mushrooms under our grove of oaks, but for now, I’m taking my time. There’s so much subtlety and beauty in the simple form of a mushroom. It’s a pleasure to look closely and capture it on paper.
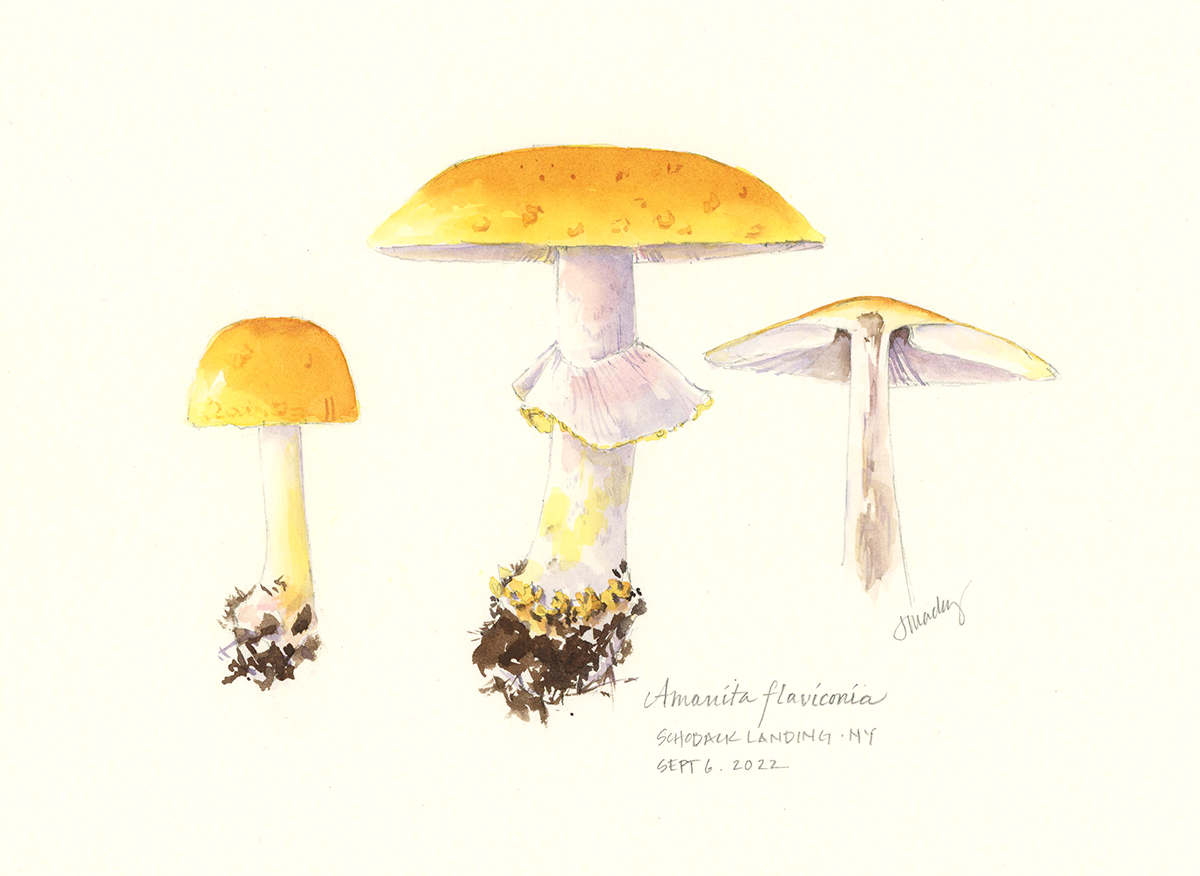
Tips and Techniques— I did this painting as a demo for my online Mushroom Explosion in Watercolor class using a photo I took last fall. A light-colored or white mushroom offers a great lesson in observation, capturing subtle colors, glazing, doing graded washes in small spaces, and precision. These are foundational skills that are perfect to practice with mushrooms, but that also translate to many other nature subjects. Take your time when you can. Choose simple forms and master them and then move on to more complex subjects. The time you spend learning to look and be precise will serve you well.
Ripe Tomatoes
August is tomato season. And it’s worth the wait. I spent a lovely hour yesterday in the garden sketching ripening San Marzanos and later made my first tomato pie of the year. Today, I’m happy to share both with you…though you’ll have to make your own for the best flavor.
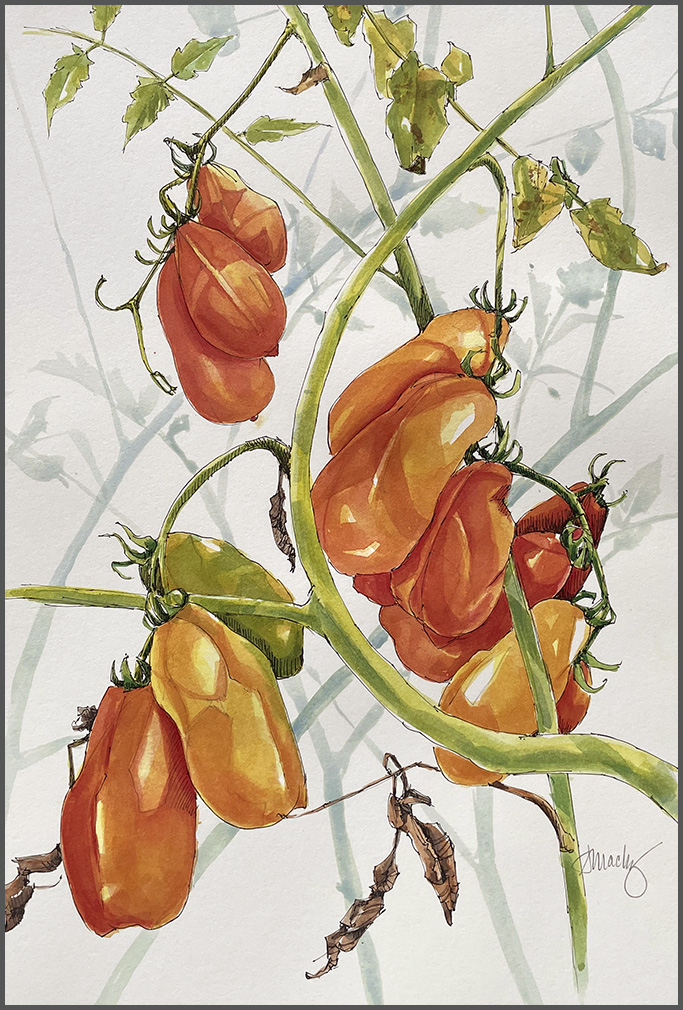

Tips and Techniques– I did this painting on hot press 140lb Fluid 100 watercolor paper. The sheet is 12 x16” and the painting is about 9×12”. I wanted to give myself more room than my 8.5×11” sketchbook affords, while also trying out this paper. What’s nice about hot press paper is that a pen will glide across it nicely if you want to use ink for the initial drawing; what’s tricky is that it doesn’t like a lot of water. You can paint fine details, but you can’t get a big beautiful wet wash the way you can using cold press. If you haven’t used hot press paper, you might try getting a small block or sheet to test it and see what you think. (p.s., It’s 1 1/2 teaspoons of baking powder in the recipe)
Eastern Phoebe
Nesting season is winding down for most songbirds, though more industrious species are still working on raising a second brood. By mid-summer the young of the year are active and you often see them flitting around testing their wings in the yard or perched together on telephone wires. Hopefully, the Eastern phoebes that were raised in this nest are among them. I took a photo of the nest back in May and finally had a chance to paint it with my class Bird, Nest, Eggs.

Tips and Techniques– Bird nests are made of all sorts of materials. When sketching one, take a close look at both the outside and inner cup and try to identify what they are made of. You’ll likely find finer grasses, plant down, or feathers on the inside and courser fibers, bark, mosses, lichen, bark, or twigs on the outside. The more you look, the more you’ll see, and the more true to the bird your sketch will be.
COMING UP: Mushroom Explosion in Watercolor, August 10 and 17 at Winslow Art Center, and Bird Nest Basics, September 13 at the online Wild Wonder Conference.
Unexpected Encounter
One evening a few months ago my neighbors came over to check on me. They had heard a terrifying scream coming from the wooded creek next to our house and, knowing my inclination to wander there, thought I might have been attacked. Finding me unharmed, we speculated that they may have heard a bobcat. I had rather forgotten about the incident until one morning this week when, to my surprise, I discovered three bobcat kittens, lounging in the road about 30 yards from our driveway. We eyed each other from a distance for several minutes—the world suddenly intimate and yet enlarged with a greater sense of the life that we so rarely see. And then the moment was gone. A car came along and sent the kittens scampering into the field.
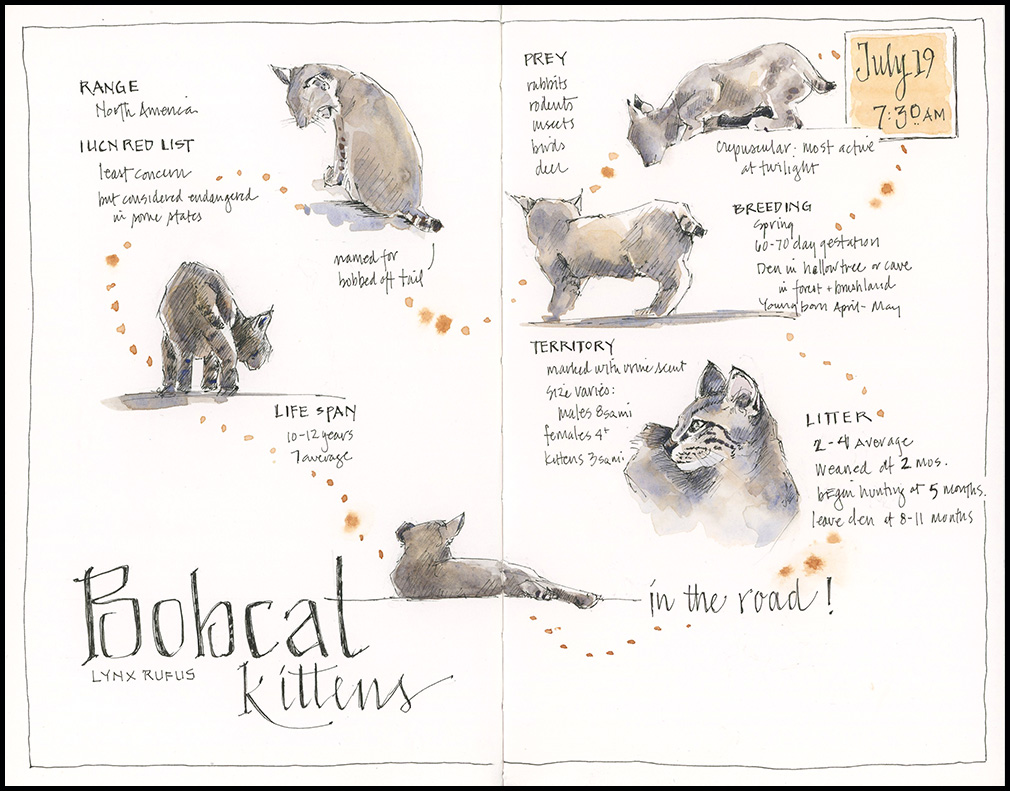
Tips and Techniques– Use your sketchbook to learn. When you encounter something that you don’t know much about, combine sketches with notes to record facts, folklore, or quotes about your subject. Don’t worry if your handwriting isn’t elegant. Remember that your sketchbook is for you. When you fill it with your own personal notes and drawings—it will be a perfect reflection of your encounters and musings.
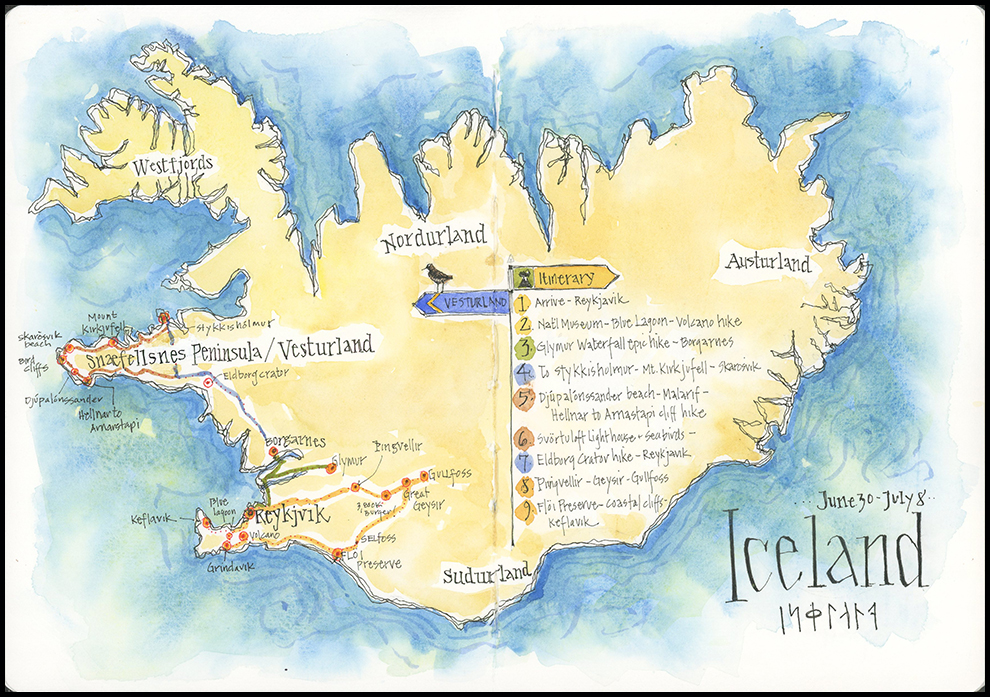
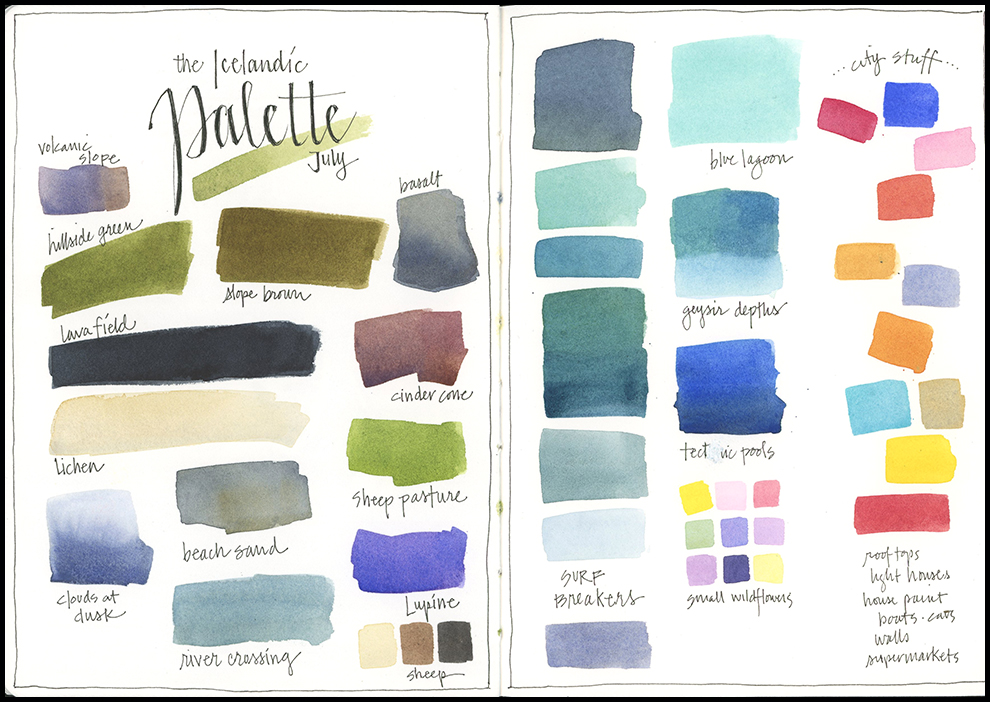
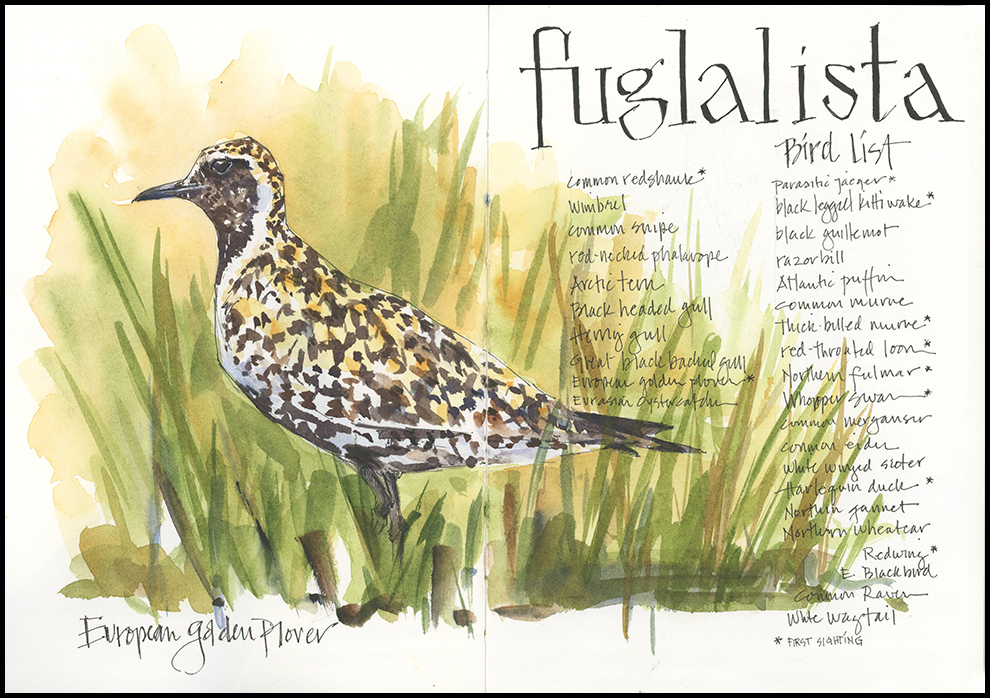
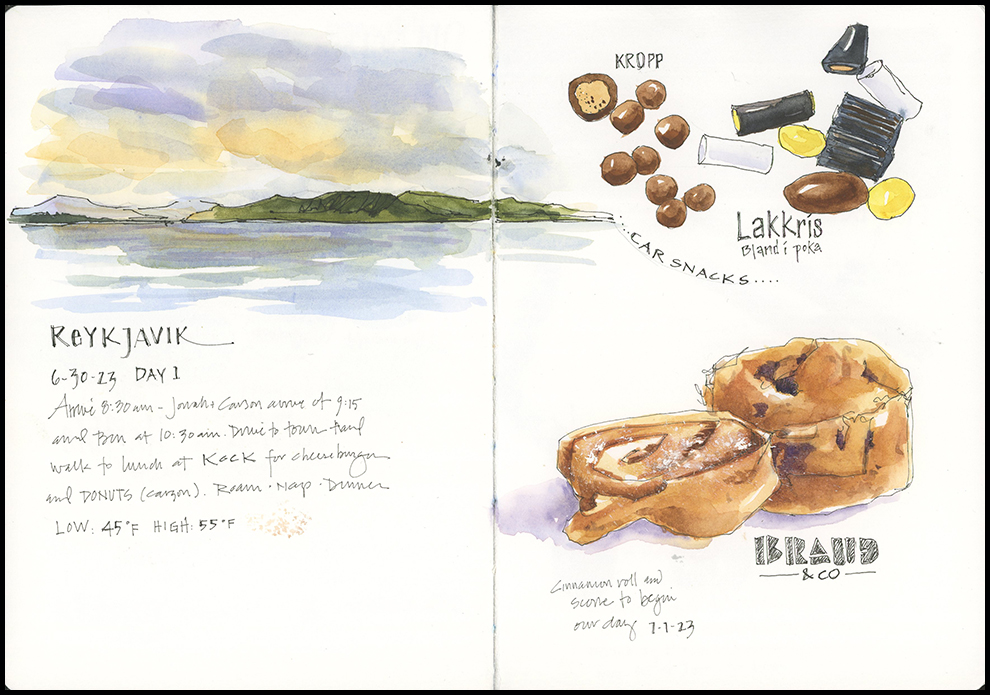
Iceland Travel Sketches
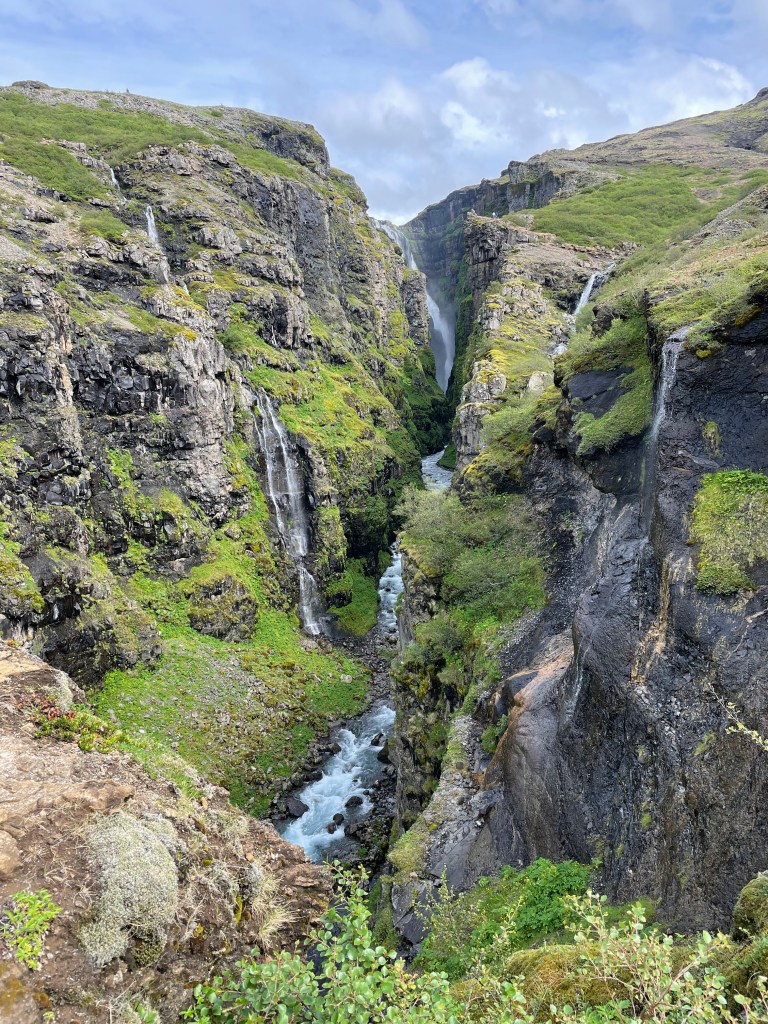
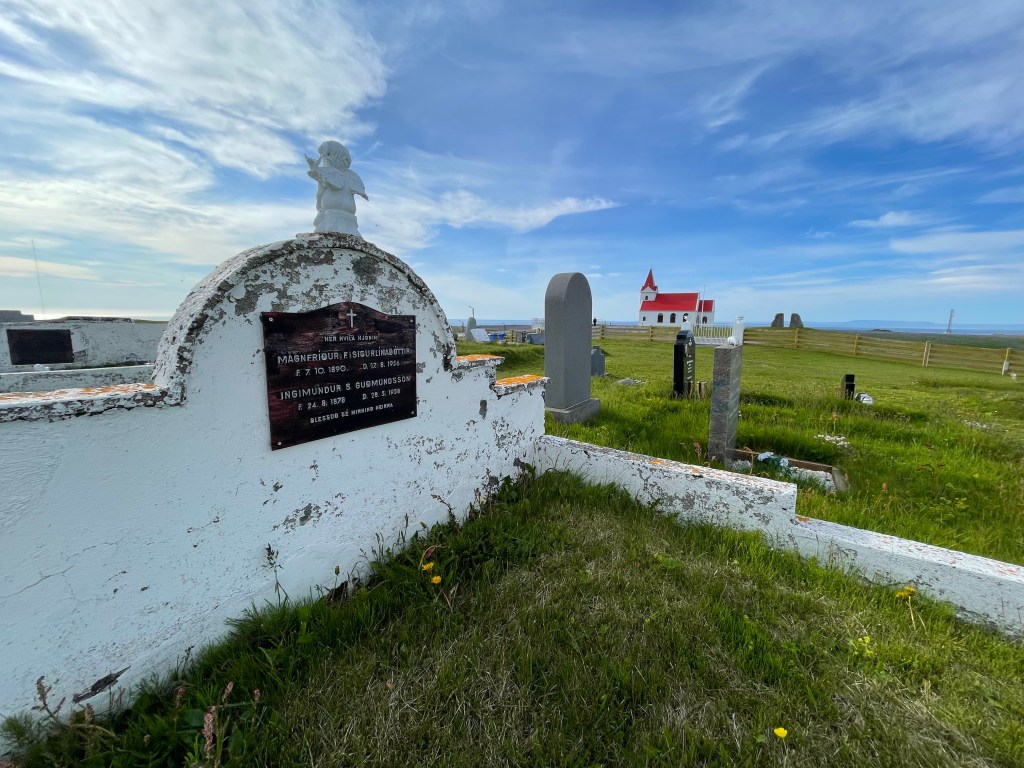
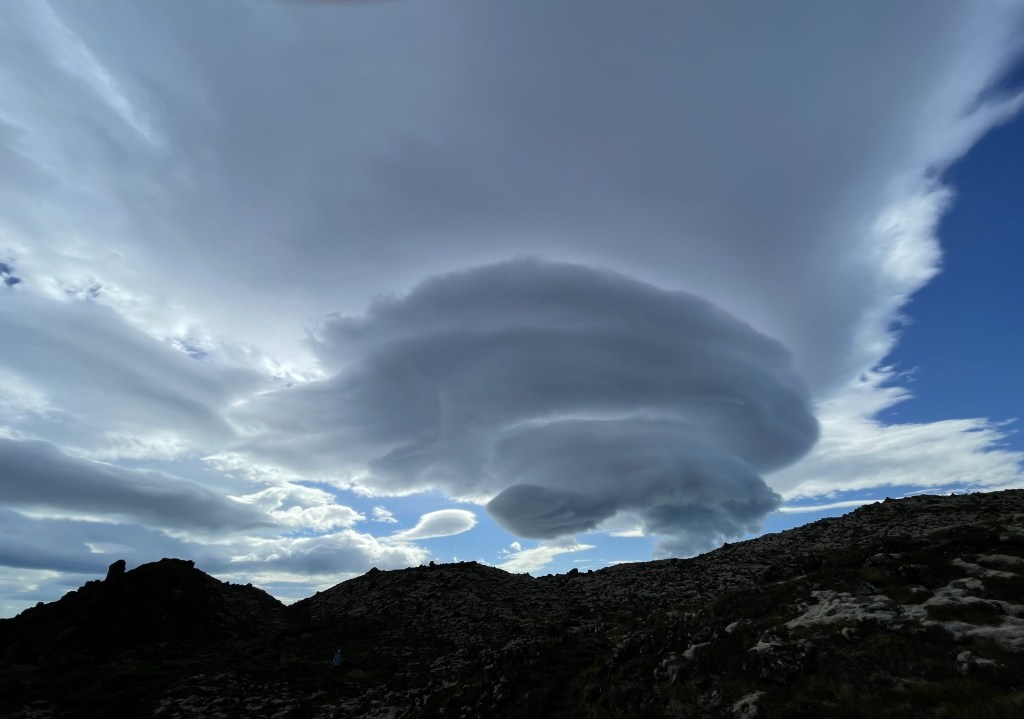
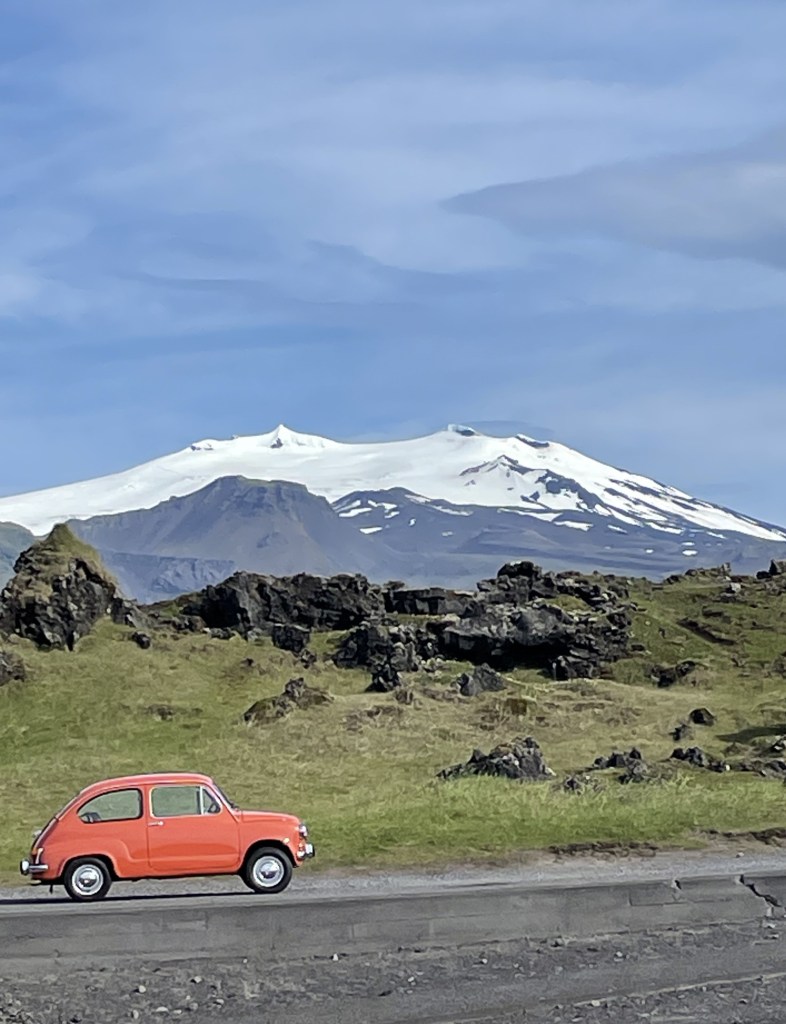
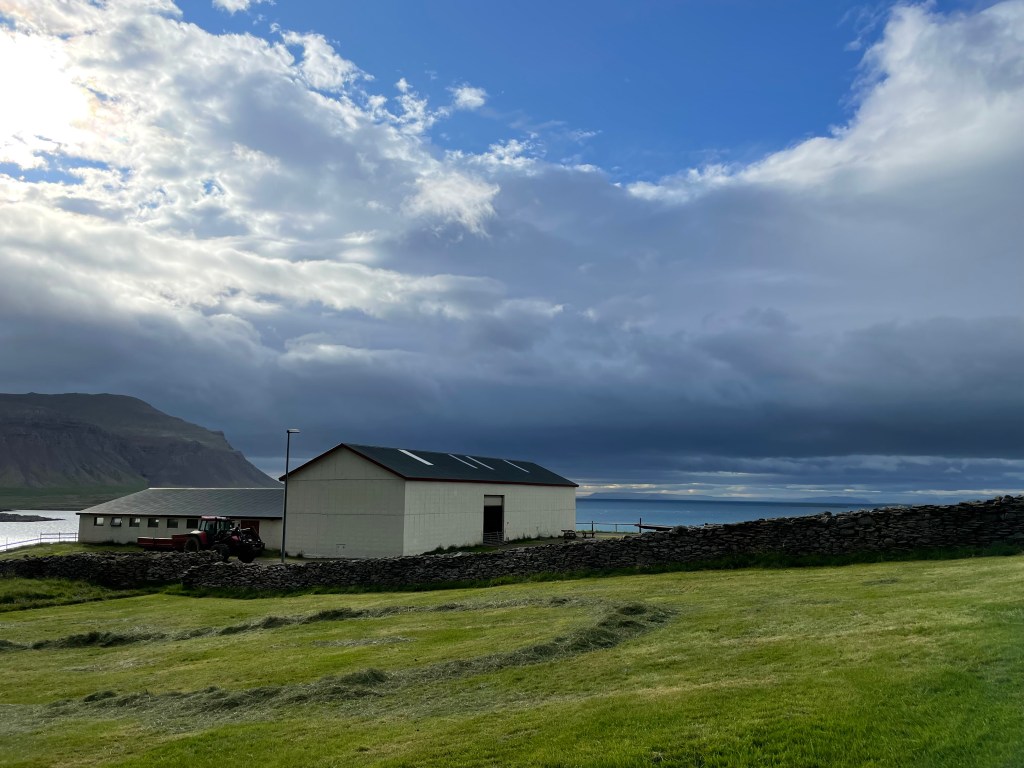
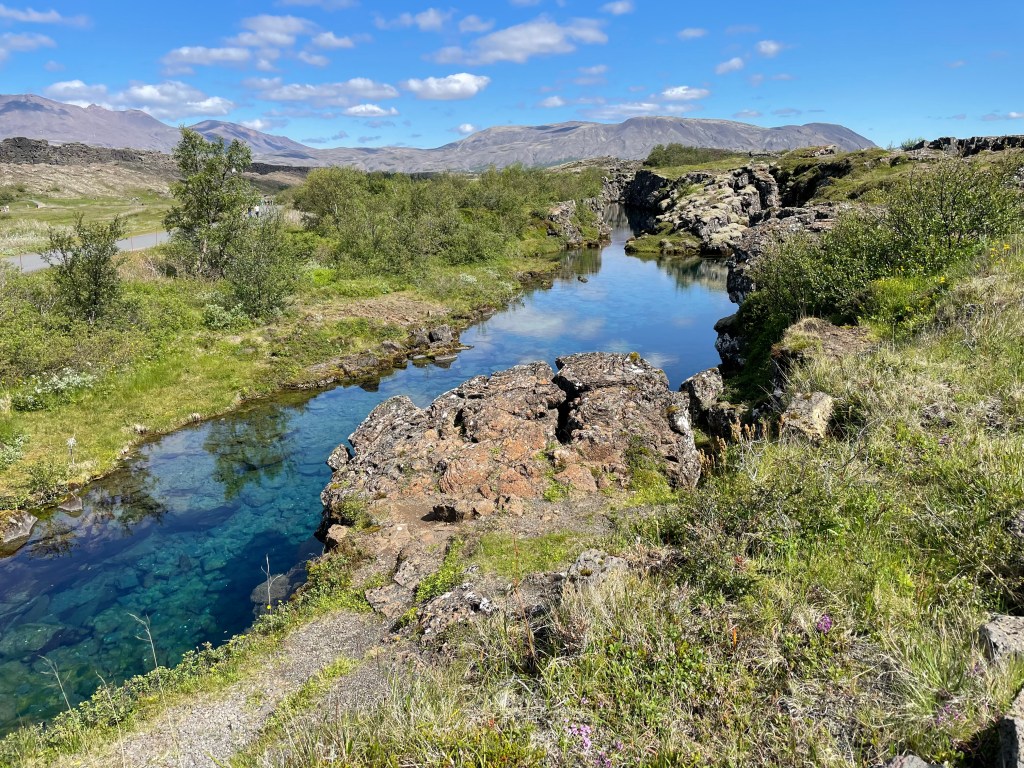
Iceland is all drama: volcanos, lava flows, cinder cones, geysers, tectonic plates, waterfalls, sheer cliffs, glaciers, frigid waters, shifting weather. It’s a place of all or nothing. All darkness, all daylight, all in, or stay home. But it’s also a place of great subtlety, where keeping your eyes wide open makes all the difference.
My family spent a week exploring just a small fraction of the country. I took many photos but managed just a handful of sketches. Despite my best preparations and intentions, cold weather, gusty winds, big hikes, and traveling with five family members made sketching difficult. Alas, I’m sharing what I have from our grand adventure with the encouragement to put Iceland on your bucket list if you’re game for wearing a wool hat, down jacket, and raincoat in July.

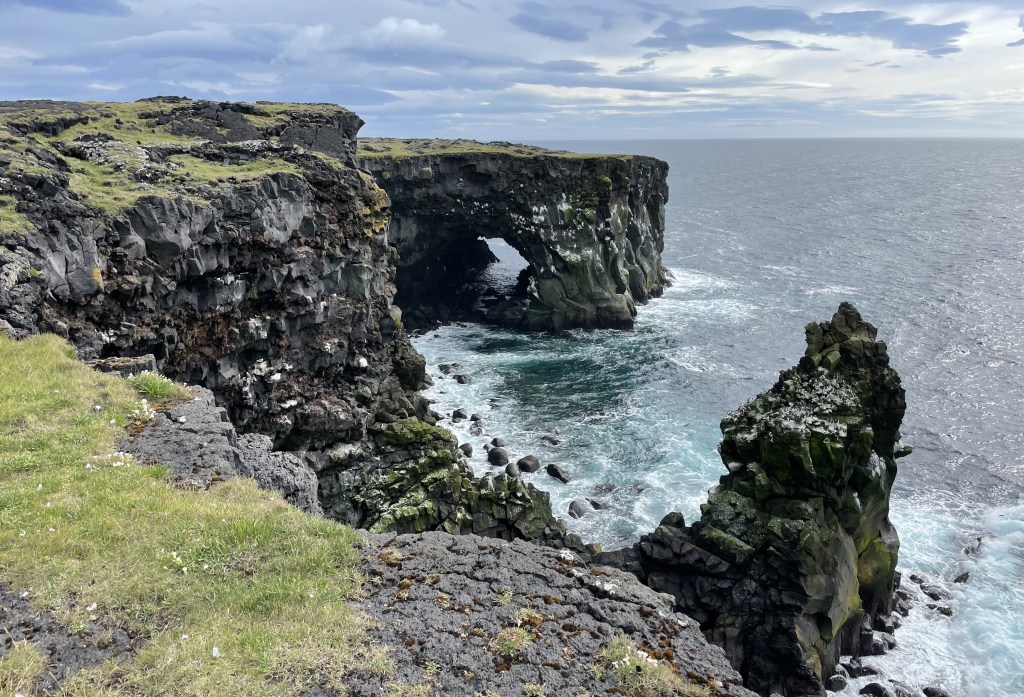
And a few photos of some of the dramatic landscapes that I wish I’d had time to paint.

Up for an adventure and lots of painting? Join me for Sketching the Fall Nature of Italy, September 30 – October 7. There are a few spots left!
Bird, Nest, Eggs
Orioles sing from the treetops in our yard, their melodic whistles descending from high in the cottonwoods. They have likely woven their intricate hanging nest up there. Hidden by greenery, we are not likely to ever find it. But I like to imagine it, nonetheless. Orioles lay eggs with beautifully scrolled markings and after hatching the young remain nestled inside the pendulous nest for about two weeks. Altogether, bird, nest, and eggs are striking. They made a perfect subject for a recent art class at Winslow Art Center and I like having this page to commemorate their unseen presence.
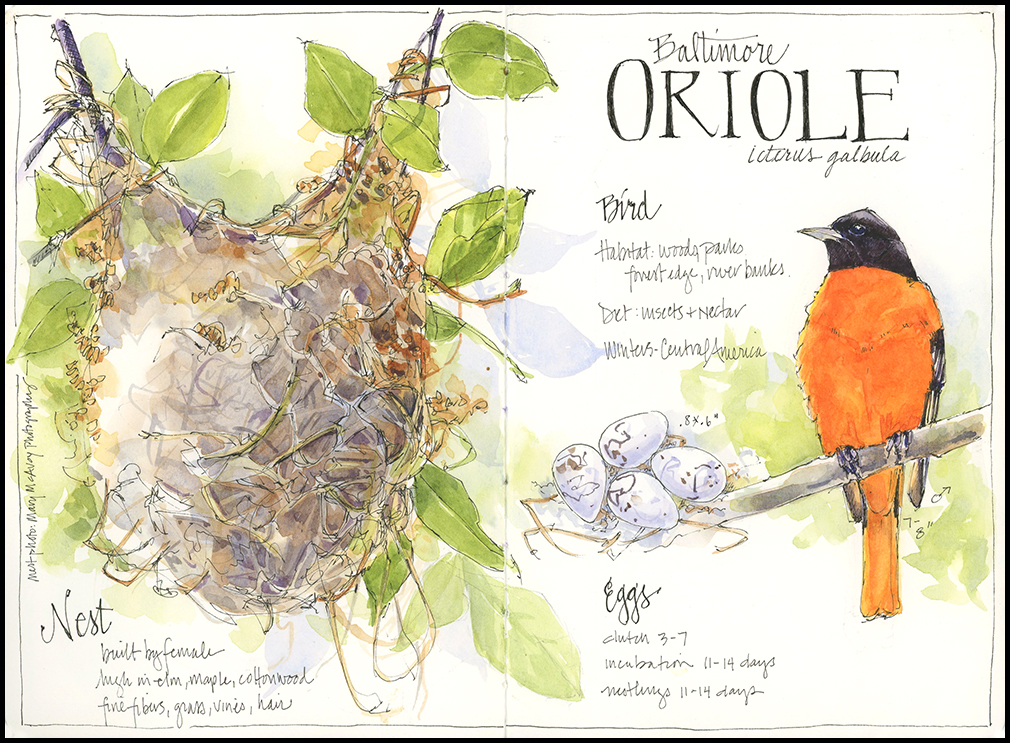
Thanks to Mary McAvoy Photography for use of her nest photo.
Tips and Techniques– An oriole’s nest is a complex tangle of fine woven fibers. It’s important not to get lost in all the detail when painting it. I start with the basic shape and pay attention to lights and darks to give the nest form and dimension. Texture comes from both the ink drawing and later stages of the watercolor. I have another Bird, Nest, Eggs class coming up in July, focused on the Eastern Phoebe, another bird with a lovely nest. Registration is open.
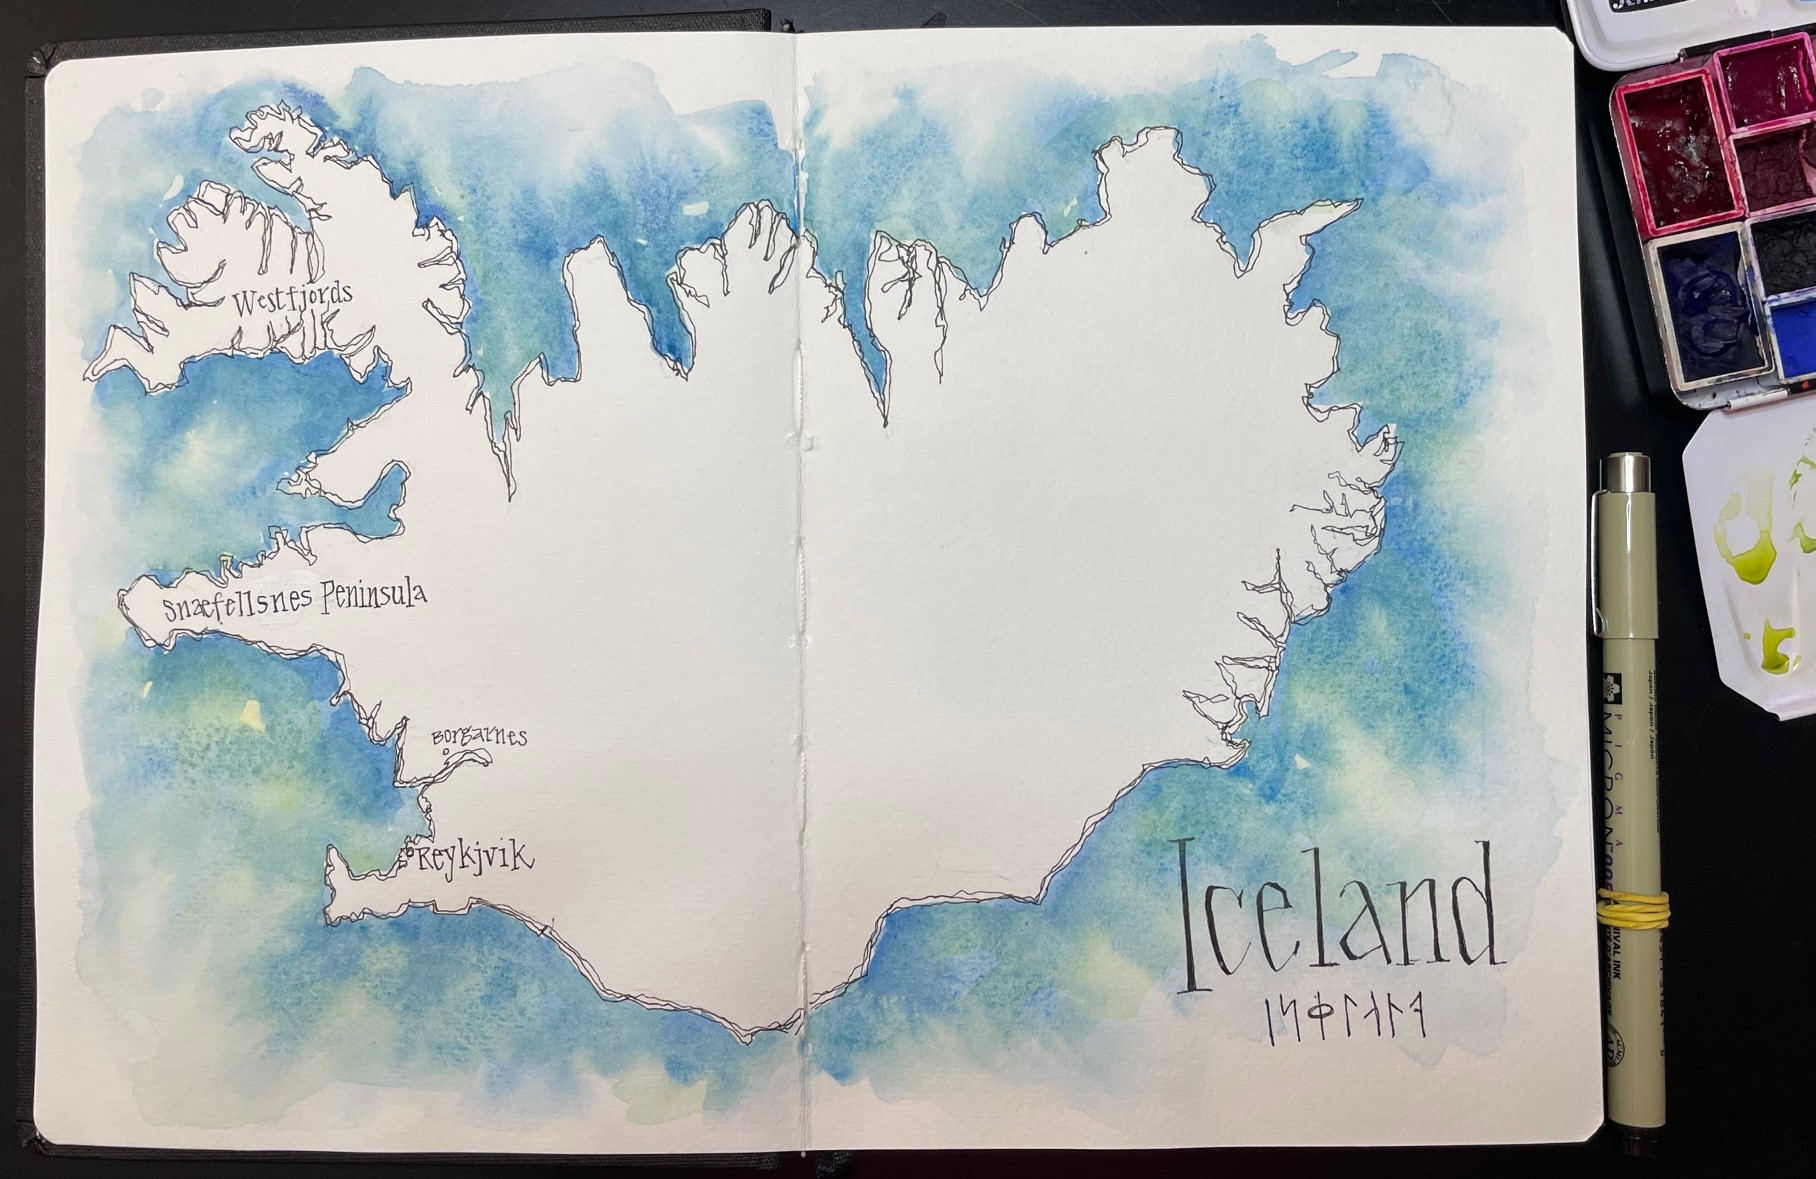
I’ll be taking a break from this blog over the next two weeks as I take off for an exciting trip to Iceland. See you with a map filled in when I return.
The Art of Walking
I achieved a big milestone this week: I’ve walked and run 300 miles since January 1st. Being outside for a few miles each day has great benefits. Witnessing subtle changes of seasons and the comings and goings of plants and wildlife, combined with a chance to think inspires my artwork and grounds me in this place. Like the roadside weeds in bloom this week, few of my miles are standouts alone, but together they add up to something worth celebrating.

Tips and Techniques– Forming a regular habit — like walking or sketching regularly– takes some doing. The two most helpful things I have found for both are making a commitment and planning your time to fit them in. For me, the two activities support each other, as inspiration while walking turns to artwork and artwork completed leads to a desire to see what’s happening next. One mile leads to two leads to 20 and before you know it, your sketchbook is full.
Morning with Poppies
A fine June morning. The last of the poppies in bloom. House wrens warble insistently near their nest, while red-eyed vireos and veeries sing in the surrounding woods. Petals drop from the poppies as I sketch—their moment is so extravagant, so lovely, so fleeting.
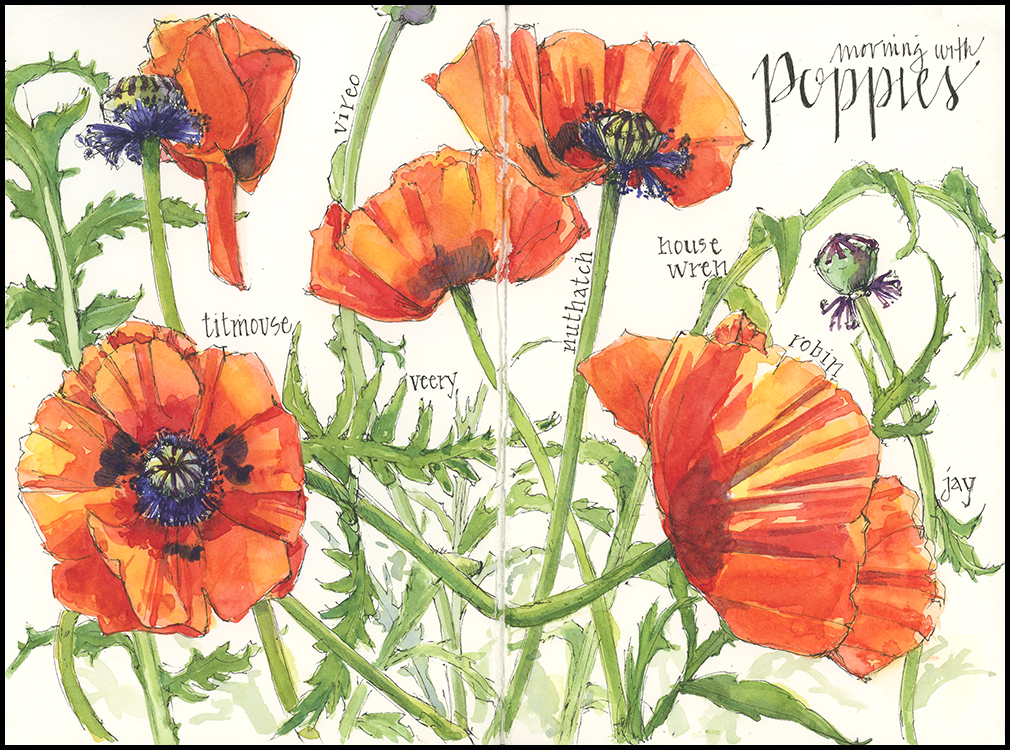
No tips or techniques today—got to get back to the garden. But feel free to ask questions if you have them.
Four Tips for Sketching Outside
Just as the lovely irises bloom each year, the deer flies and black flies hatch. It makes misery of sketching among the graceful petals. I’m pretty sure this page was not worth the bug bites, but it’s all I have to share until I brave heading out again.

Tips & Techniques– As much as I love sketching outside, I have my limits. Sometimes it’s just too hot, cold, windy, buggy, — (fill in the blank). But I have developed a few simple workarounds for sketching in challenging conditions. Hopefully, they’ll work for you, too.
- Skip the pencil and eraser. If you typically work in pencil first and then trace your lines in ink, try working directly in pen. This saves time and fuss but means that you must accept some wonky imperfection. It’s a sketchbook after all.
- Sketch out, paint in. When it’s very hot or very cold, this is an excellent option. You still get the direct experience with your subject, which will translate to the page far better than working from a photo. Snap a photo for a color reference or make color notes on your page.
- Prepare as best you can. Take note of potential challenges so you can avoid getting stymied by them. In summer: add a hat, sunscreen, water, and bug spray (as needed) to your sketch kit.
- Abort the mission when necessary. I sometimes head out with the best intentions and come home empty handed. It’s disappointing but sometimes it’s better than a frustrating sketch.


